If it involves anything spinning, on fire, or capable of doing major bodily harm-I'm in! All my interest in art has revolved around most things capable of seriously hurting myself-spinning wheels, hot kilns, grinding stones (and nails), cutting and soldering hot metal-love it all! A good friend of mine once said "if you are not living on the edge, you're wasting air..." this is my own personal quest in that regard....
About two and a half years.. . Lots has happened during that time and I’m just getting back into the studio , easing into things with some fun projects.
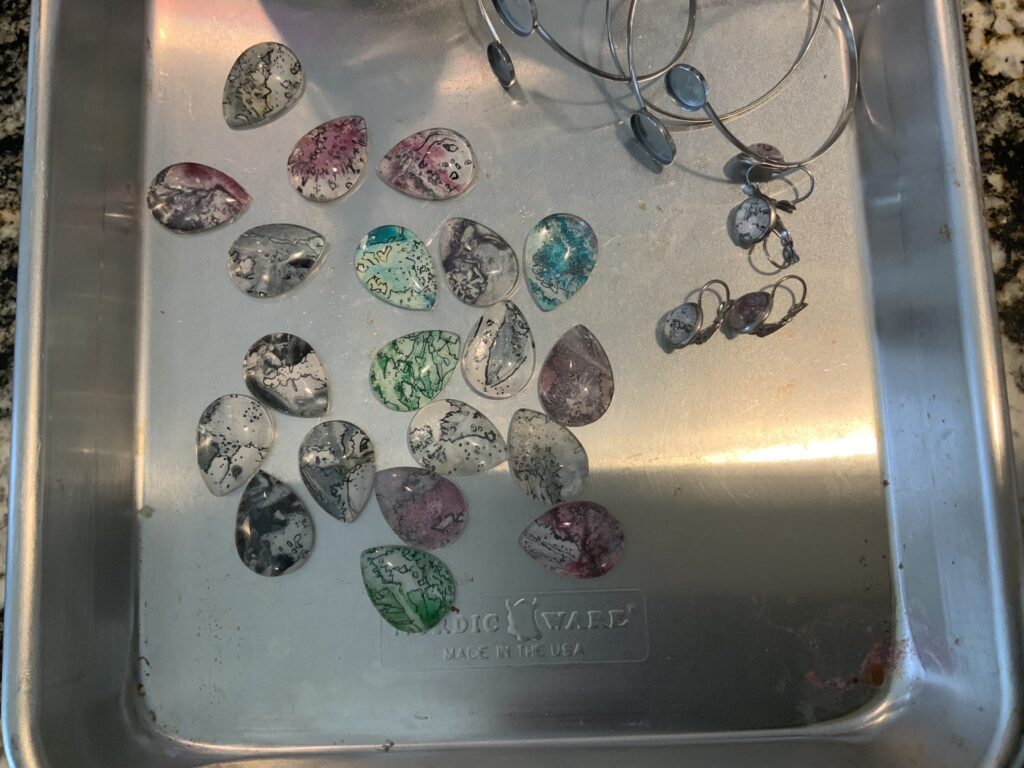
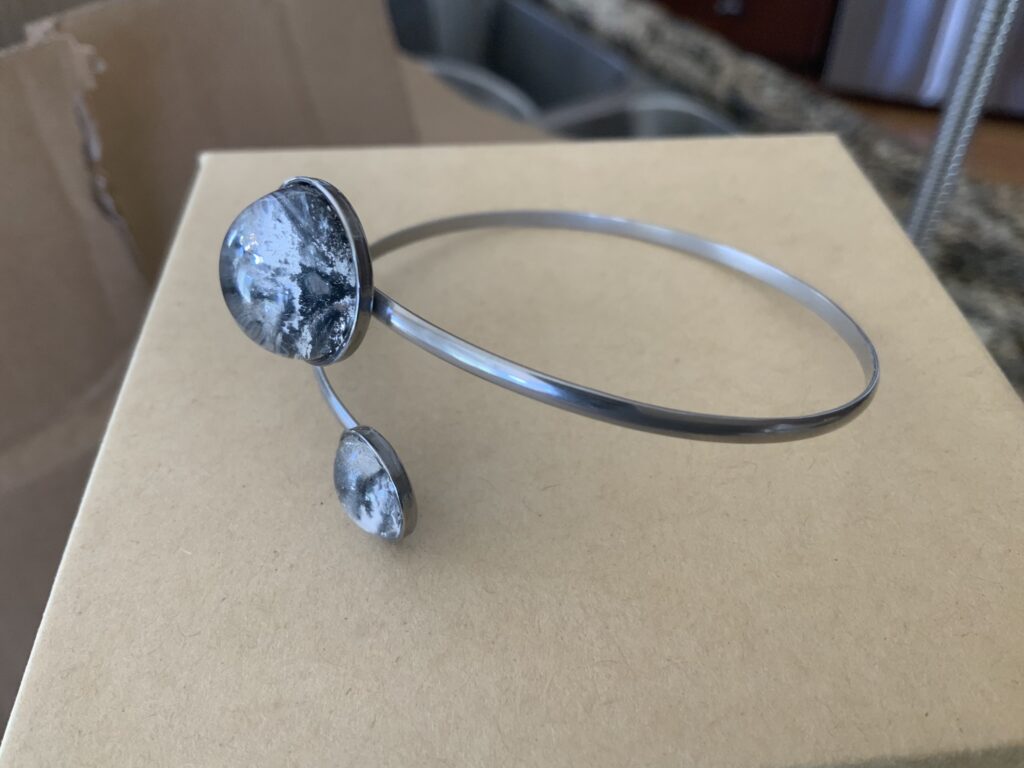
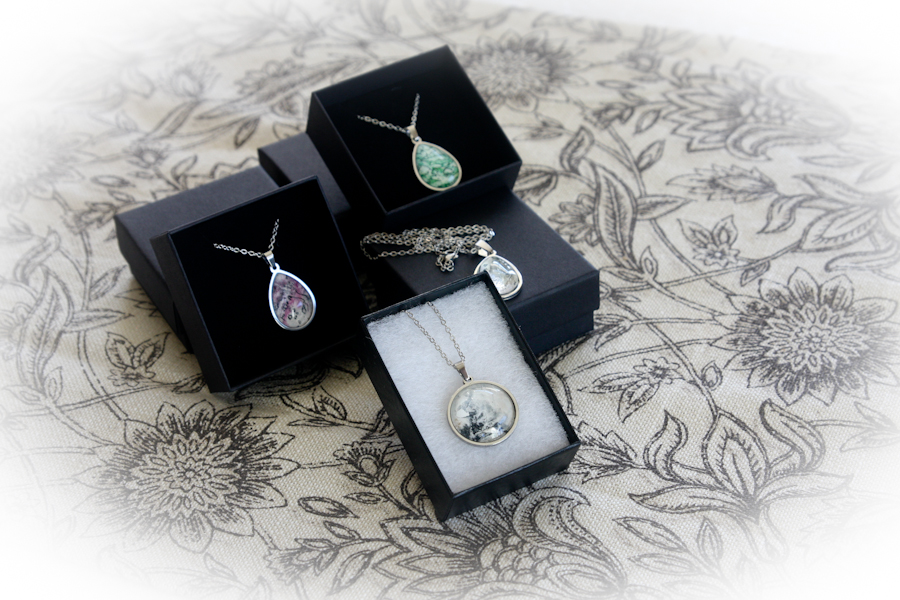
I haven’t been cutting metal recently but I did create some pencil, ink and pen collages and back ground papers. A lot of them. They formed the basis of these pieces, that included purchased findings and domed glass.
And a few more…
I think I’m done, have that process out of my system, so on to something new. Trying to take advantage of our long and warm Fall here in the Kootenays, when I don’t need to heat my studio. Right now it is full of mixed media madness, creating fodder for the next project- Hand Bound journals,
Even managed a quick fishing trip on the lake last week, it was magical ♥
Since gardening and other outdoors activities involve breathing toxic smoke for the moment, the dining room table continues to multi task-
Art journals, diary journals, junk journals… I just can’t get enough of these precious little things. It’s taken months of trial and error to find “my” style and what I enjoy. Each chronicles part of my art journey in mixed media, spilling over into other areas of my life, including metal smithing. They are all packed and ready by the door to just grab and go if we ever need to evacuate….
I had been using beautiful papers from Zazzle for some of my journal covers but they did not stand up where they were involved as part of the hinge assembly. That took me down a road for an alternate method of attaching covers and spines to the inside papers (signatures). I’ve ended up using book tape binding and I love it! Now I can use delicate paper, cloth or whatever I decide. It’s delicious!
Back to my fabric stash from mark making with the hand made brushes….
This week’s projects included 2 journals . The first one I used both fabric I marked, and paper I did at the same time, in teal and blacks. I’m not usually a teal blue kinda girl but-its what was on hand. It’s about 7×5″.
The scruffy black crow just seemed to want to be on the cover, so that’s where he went. Finished.
Book #2 was much smaller, about 2.5×3″. I’d vegetable dyed the pages many months ago with purple cabbage (yes, it works beautifully), and they were just waiting for a cover—in blues. Which I NEVER work with. I really am trying to finish some of the many half finished projects I have on the go and was determined this was going to be one of them. Blue or not.
Finding a focal for the front is always an interesting exercise. Yesterday I decided silver would look good with the black onyx stone I had on hand. The silver I had etched over a year ago and forgot it was a much heavier weight than I usually work with and after some challenges, managed to cut, drill and polish the oval piece and set the onyx. I just noticed I am missing most my right thumb nail on one side…a shop casualty I think.
But first I needed to finish off so many projects, all in various stages of production. Today was the day!
My studio is an eclectic mixture of stuff. I have metal art pieces on the go, mixed media journals and wall art, encaustic wax panels and sewing. I began with the mini journals that have taken over the dining room table for the past 2 months.
Caterina Giglio is an amazingly talented mixed media artist I have been following for years. One of her posts from 3 years ago features Miniature Book Making and that’s where I started with these little journals.
I love the embellishment part of the book making process. I also am a “keeper” of things…so I have a good sized stash to play with when I need inspiration. These are what I finished today:
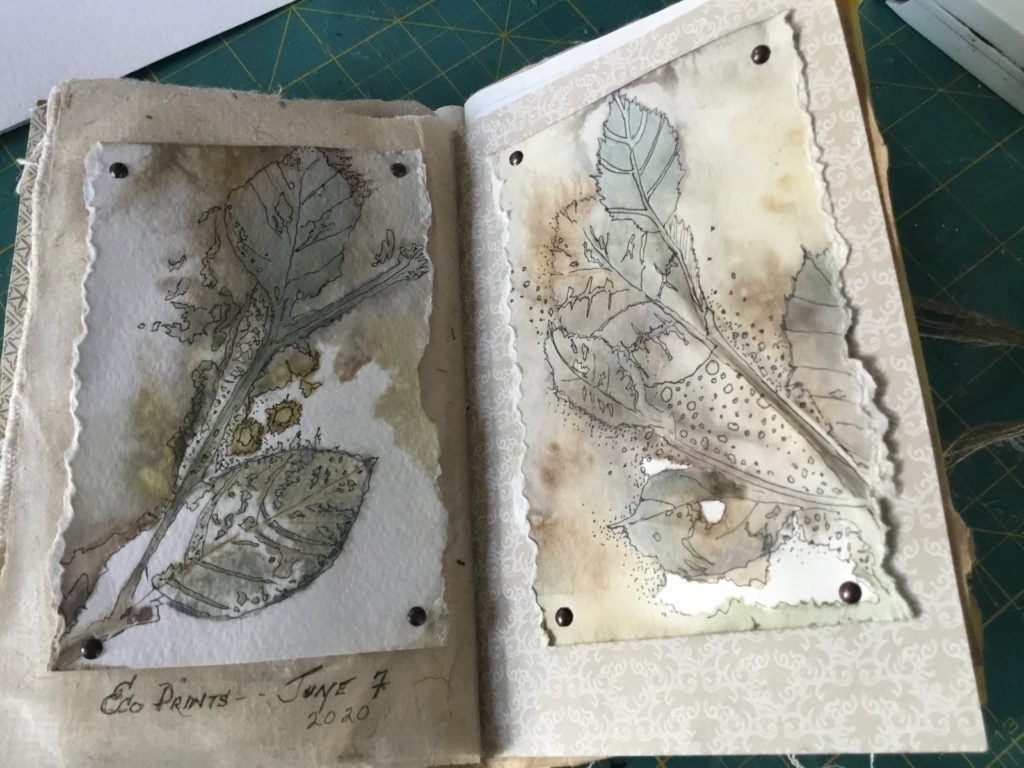
These little books are 2 1/2″ by 3″, and this one is covered in an eco printed cotton that I did with maple leaves a couple of years ago. The patterned paper is also an eco print, embellished with pen marks, created about the same time. If you’d like to see the eco printing process I used, view my post here.
The little brass bezel in the center was one I made about 6 years ago. The base is etched brass and the center is a copy of an old angel print that I encased in resin. It’s been waiting patiently in a drawer to find it’s forever home ♥
These books are all 2 1/2″ x 3 1/4″ high, with the signature pages finished with various paint techniques. This one has a reticulated, etched piece of brass on the cover that I did over 10 years ago…and another piece of that eco print, finished off with recycled Sari silk ties.
I happen to not only love feathers, but am fortunate we have wild pheasants here in our Valley. This is a donated one…
I adore the colours in this one and it’s extra special because that’s a photo of my Grandma in 1930…swimming at a local beach. It’s encased in resin in an etched brass bezel , and attached with tiny screws. The eco prints were made with local botanicals and the wrapping is a tea dyed cotton.
The final one I finished was another brass bezel, this one is a silver heart and a tiny garnet. It has a cloth cover and another tea dyed wrap.
I found the paper based covers were not standing up, so switched to fabric. I really like the rough cottons and just happened to have a stash of that as well…
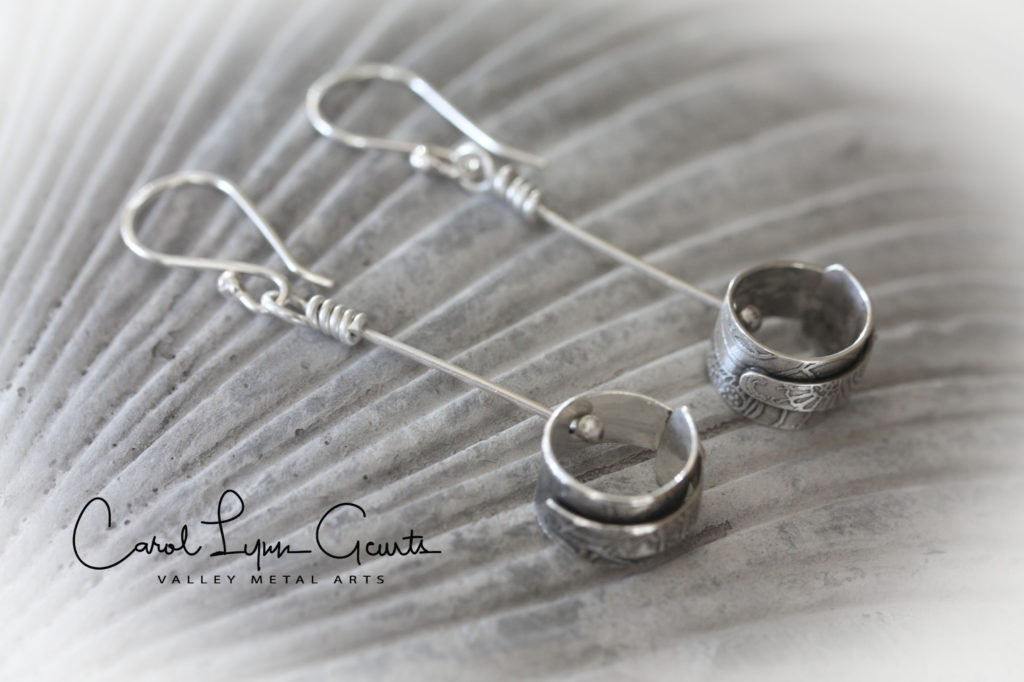
A few sets of ear drops made their way under Christmas trees this year..
These lovelies were based on the same concept as the adjustable rings I posted earlier, but much smaller. The rings are etched silver and the rest is hand formed silver wire.
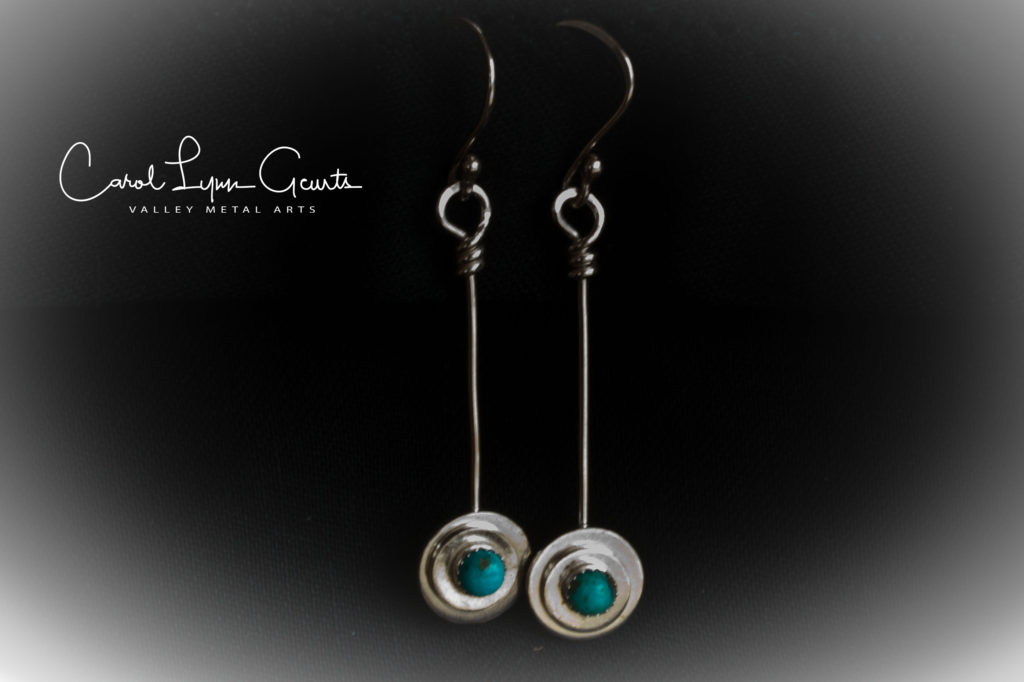
I had a few small cabochons on hand and made these pairs with Labradorite, Turquoise, and some silver balls in an etched disc. I’ve had great feed back on the hook style of the last 2, and will be doing more of those for sure!
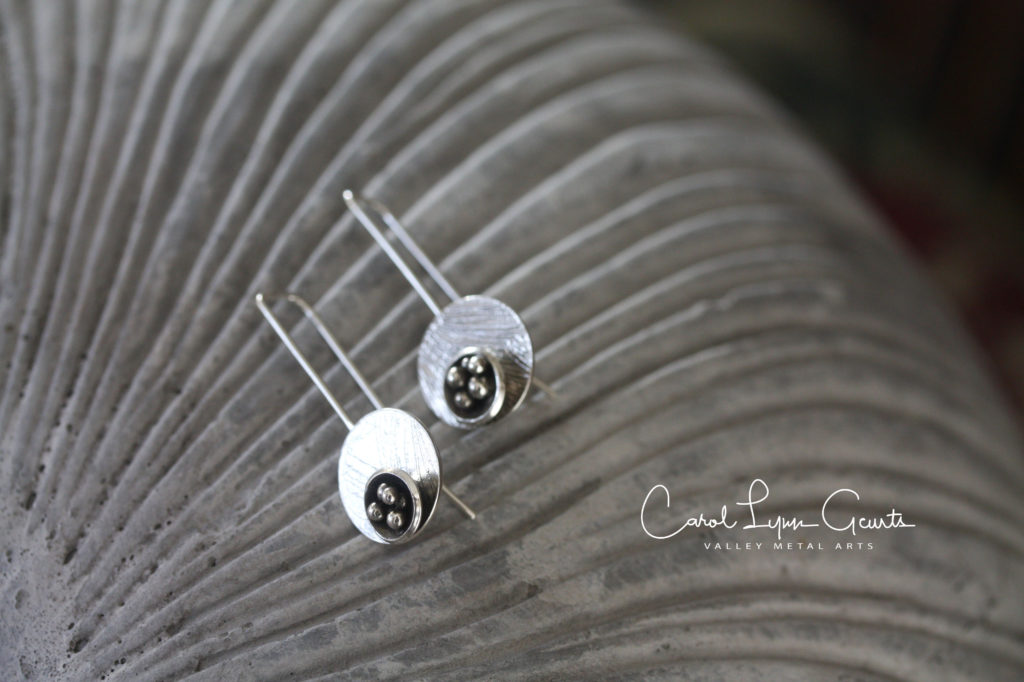
It’s always the $64,000 dollar question…you either really like the darkening effect on the silver, or you really don’t. I go through phases of both. Currently I am putting a patina (Liver of Sulfur bath) on everything…and then polishing the daylights out of it.
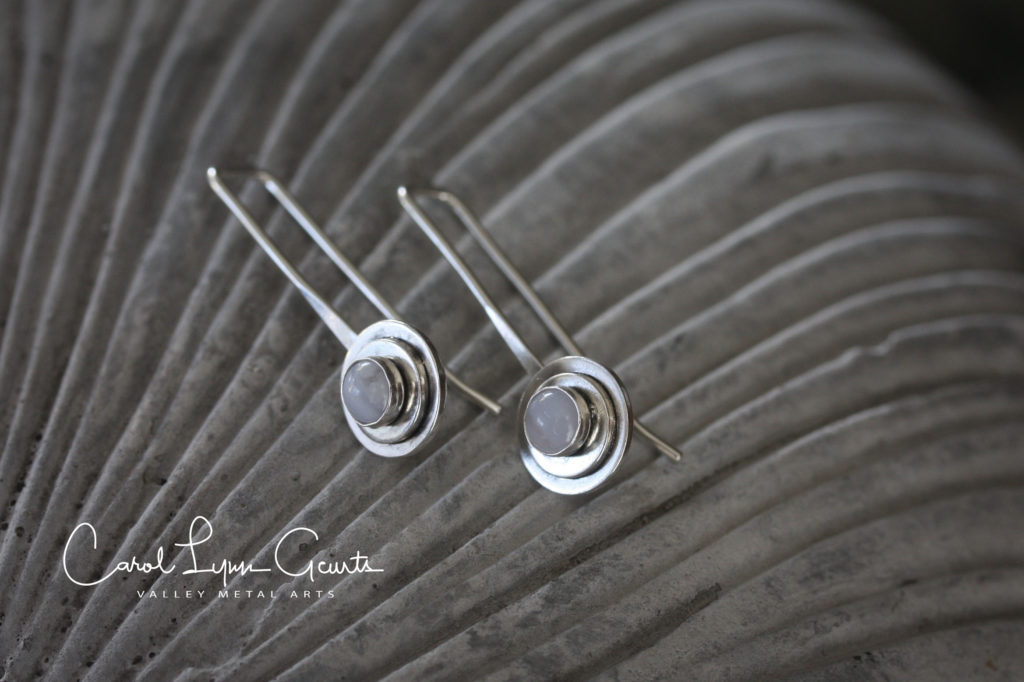
I’m also using lots of wire in this wrapping process. I adore the messy aspect of this wrap, and it works really well with the ear wire design with a similar ball finish. This is one of my most asked for styles, but I keep them differently sized and shaped, and obviously wire wrapped, so no pair will ever be identical-or even remotely so.
Old World Charm seems a fitting description for this cuff. I found the picture a couple years ago, made it into the round bezel you see, and then it sat in my workshop for many months…waiting for just the right place to land-so to speak. And then…(the saga goes on) I took apart a brooch that had been collecting dust. The brass filigree that surrounds the bezel came from that, and it seemed like a perfect fit. It is attached to a brass cuff that I made and embellished with silver solder and acid etched with a fabulous French motif. Some days (nights) the stars align and magic happens-this was one of those times!
Please scoot over to my store and take a look at the rest of my available pieces, while you’re here, please leave a comment!
My 3rd piece featuring one of those fabulous escutcheons! I love the way it looks on top of the brass etched cuff, combined with the silver solder and antique finishing. This particular cuff was etched in a French script, one of my very favorites to use. I can’t seem to let them go without a final flourish of a single vintage rhinestone…it just feels like a great fit!
Please wander over to my store and take a look at the rest of my available pieces, while you’re here, please leave a comment above!
The next steps to helping you incorporate some of the amazing prints into “something”!
I began doing Eco prints in 2018 using the flowers from all the spectacular arrangements that arrived in our Mom’s hospital room during her final days. It seemed like a fitting way to preserve some of those moments. These are prints I felt symbolized the changing seasons, and somehow, the cycle of life. Each has it’s own mood or presence, and are deeply connected to our Mom. These are simply matted and framed, letting the “flowers” speak.
Obviously I can’t frame every print, since I’ve created hundreds since then. Nor do they all have the same meaning for me, but each deserves to be recognized in some way- so here are some ideas for you to consider once you start down this same path ♥
To begin, I did some pen markings on each piece. My preference is the .01 pigment liner pen, that I just adore. However, there are lots of options and you can use whatever pen or pencil suits you. I usually have a stack of cards with me and “doodle” whenever I get a few minutes of quiet time.
Before and After….now what?
Book Marks~
These were easy-I cut the paper into lengths I liked, darkened the edges with Archival ink, signed and dated on the front and stamped a message on the back. “Calmness” is my newest matra…
Journal entries ~
I could probably fill an entire journal with these eco prints but I didn’t… I positioned this one on a canvas page textured with plaster and crackle medium, then added the sentiment. It seemed fitting for this unusual point in time.
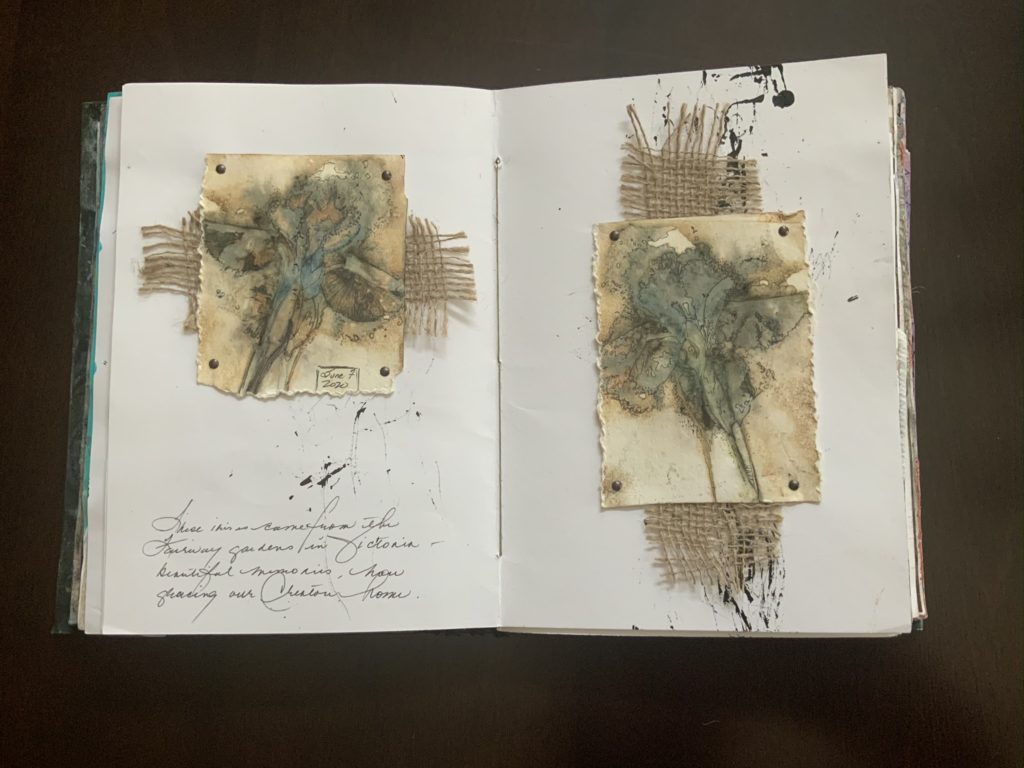
This particular Iris came from our Victoria gardens and had quite a journey to it’s new home in Creston, over a 3 year span. It has a special meaning for me, and I just had to do a journal page (s) for it. This one is India Ink marks made with a hand made horse hair brush (another story here), a layer of burlap, and the Iris prints (doodled) attached with metal grommets.
Note Cards ~
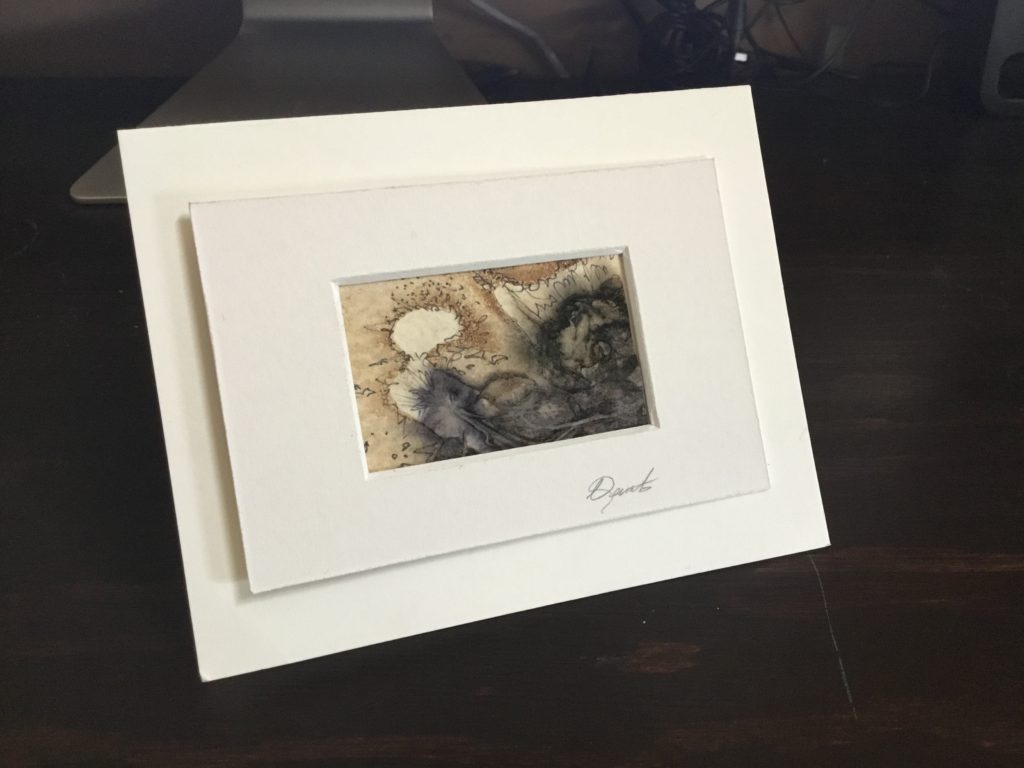
This is my newest and most fun project of late. I adore being able to carve up the pieces to showcase a tiny segment, rather than worrying about a large composition…it also creates many more “Christmas” moments since you can’t really see the final product until you position a frame over it. This was one of my “ah ha” moments….
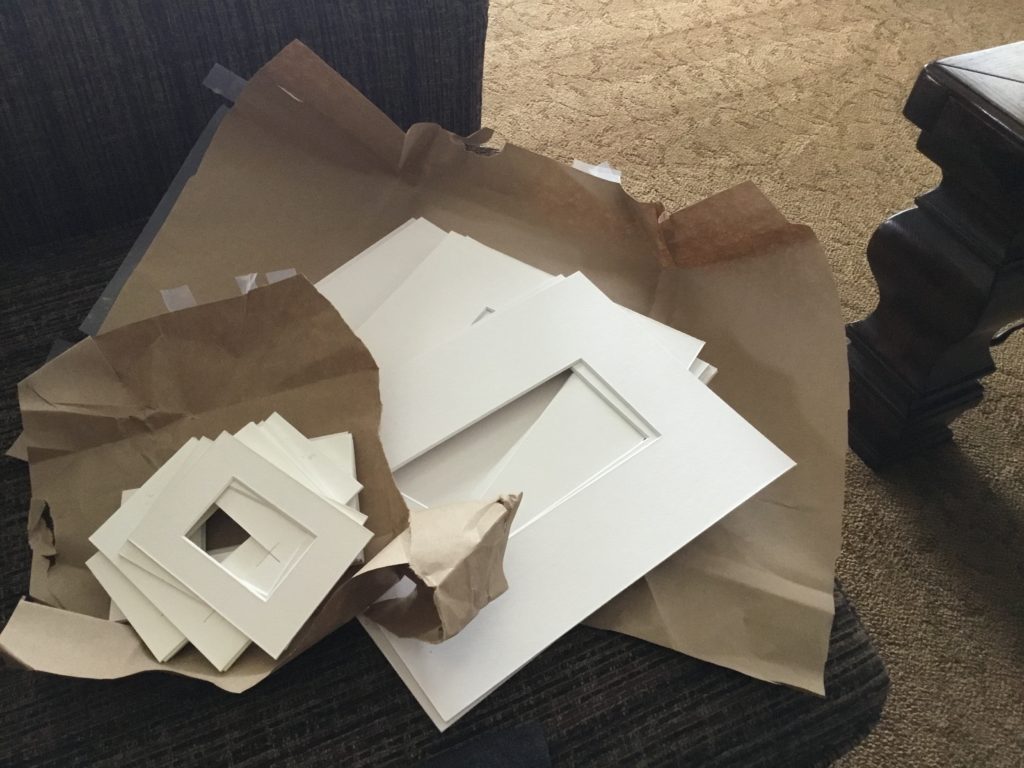
I am fortunate we have a wonderful little framing company locally, and it makes it easy to customize anything I need. 4 Corners Matting and Framing are terrific to work with, and I can shop local too! This was their last package they hand delivered to my door:
I hope I’ve given you some ideas and inspiration to dive into the world of Eco prints, you’ll love the journey♥
I’ve been asked recently to show how I create the Eco prints I use in some of my mixed media pieces. I managed to video and shoot some of my most recent production and it’s here for you to enjoy ♥
Before I began this project, I’d made a jar of mordant. This was done by mixing 2 parts water and 1 part vinegar , and adding a handful of rusty bolts and/or steel wool. Put the lid on and leave for 1-2 weeks, and by then it should be a rusty orange colour. (This iron mordant will keep for years). The mordant is used to “fix” the colours of the flowers/greens to the paper.
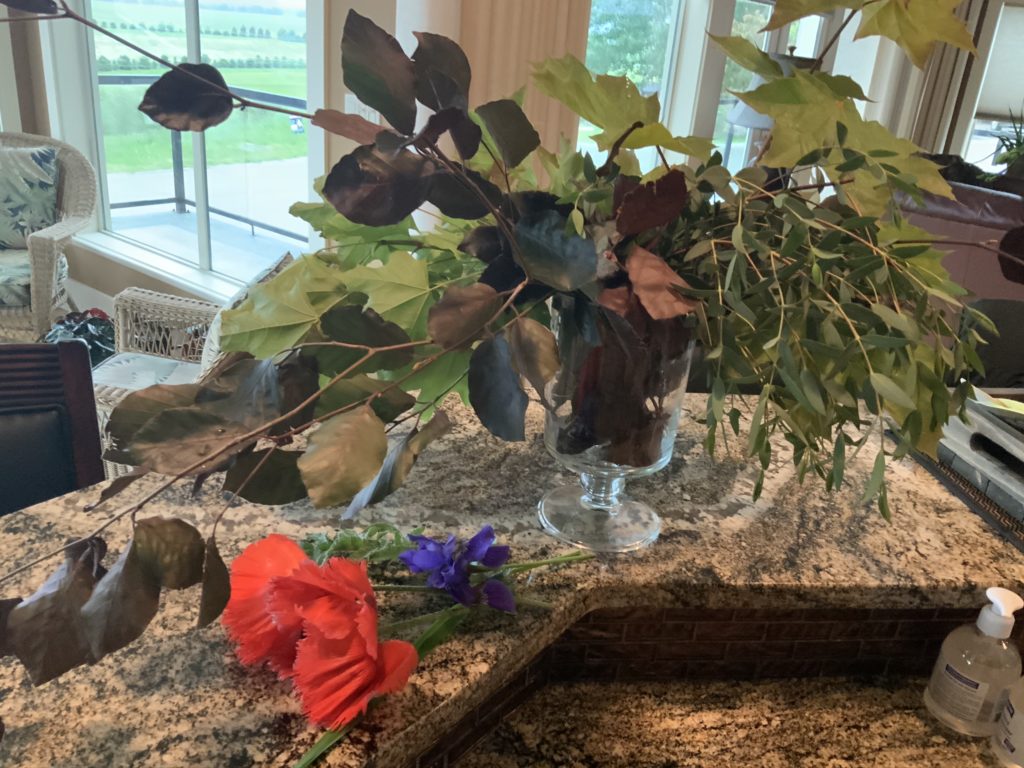
A few cutting from the garden….
I started with gathering up some maple leaves, weeping birch, Eucalyptus, a poppy and a couple Irises. Had I found any oak loaves, I would have definitely included them! Even some dried leaves will work, and when I am really desperate in mid winter, a visit to the flower section of our grocery store has lots to offer.
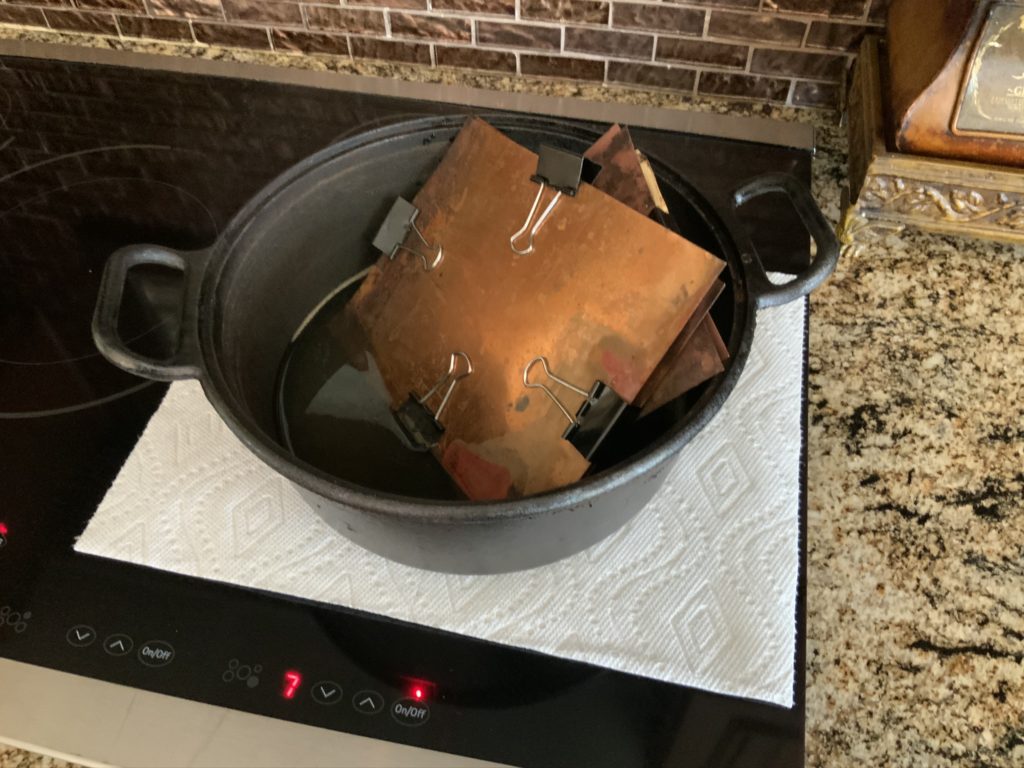
This is the paper I used but I have also used copier paper and other different weights,so just experiment and have fun! I tore my pieces to fit between the 6×6″ pieces of copper I used to steam them .
Next was the messy part….
I placed the torn papers into a bowl of water and let them soak 10 minutes or so. A bit of mordant goes in a plastic container and then I dipped each leaf or flower in it, before layering them between the pages. (You can also soak these for awhile and likely get stronger results but I’m not that patient, and like what I get from the very limited “dip”.) You want them as flat as possible so don’t use anything too bulky. I kept going until the bundle reached the maximum size my paper clips could handle. Use gloves for this part, you don’t want the mordant on your hands.
After clipping the copper plates together, they went into a steam bath. I have an iron pot I use only for this purpose. It also works great on the barbecue if you don’t want the smell of wet grass in your house-I stacked the plates into about 2″ of boiling water, turned the heat down to a simmer, covered with tin foil (lid wouldn’t fit) and let it go for about an hour. I needed to refill my water once.
The Magic…..
And some of the results:…..
You will end up with a wonderful stash of fabulousness….and will become addicted to this stuff. However, after awhile, you really need to move forward with actually doing something with them. Come back here in a day or two and check out some ideas I have-can’t wait to share!!
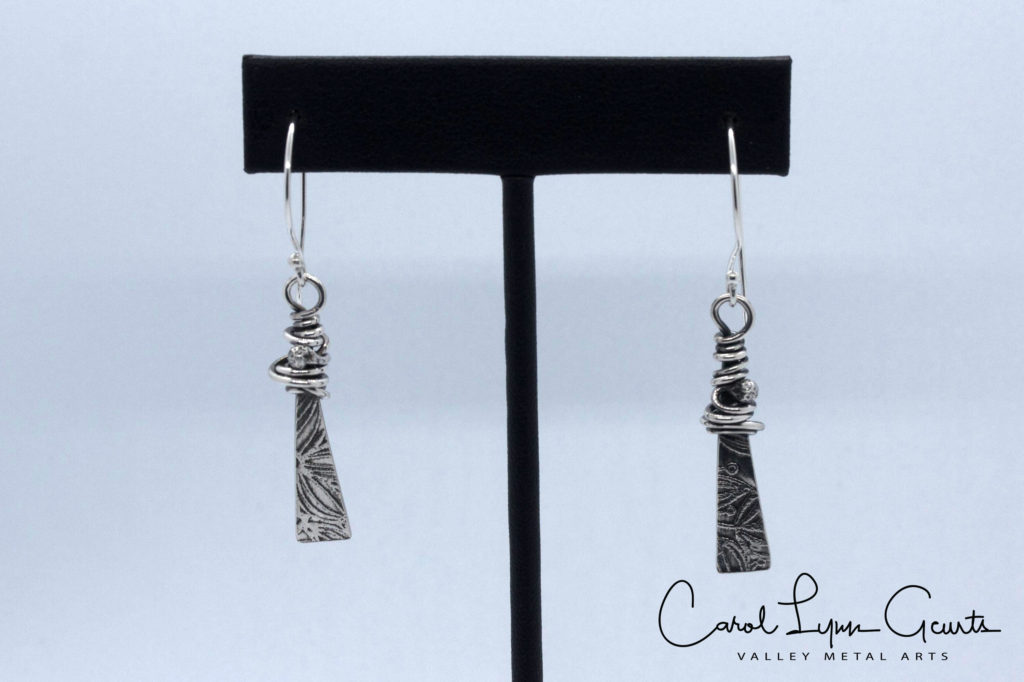
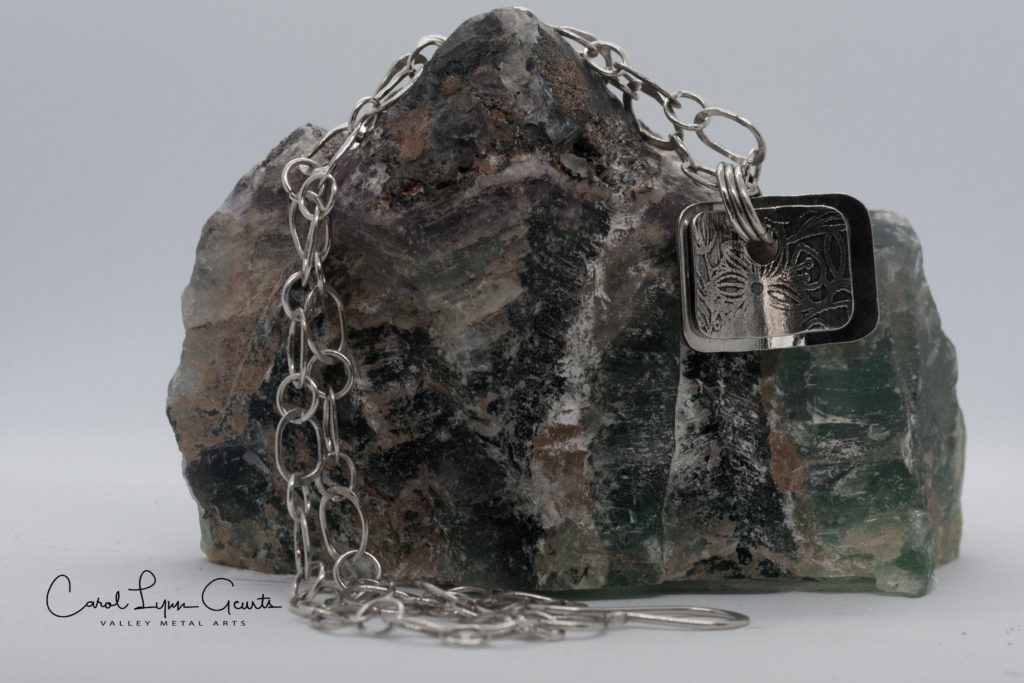
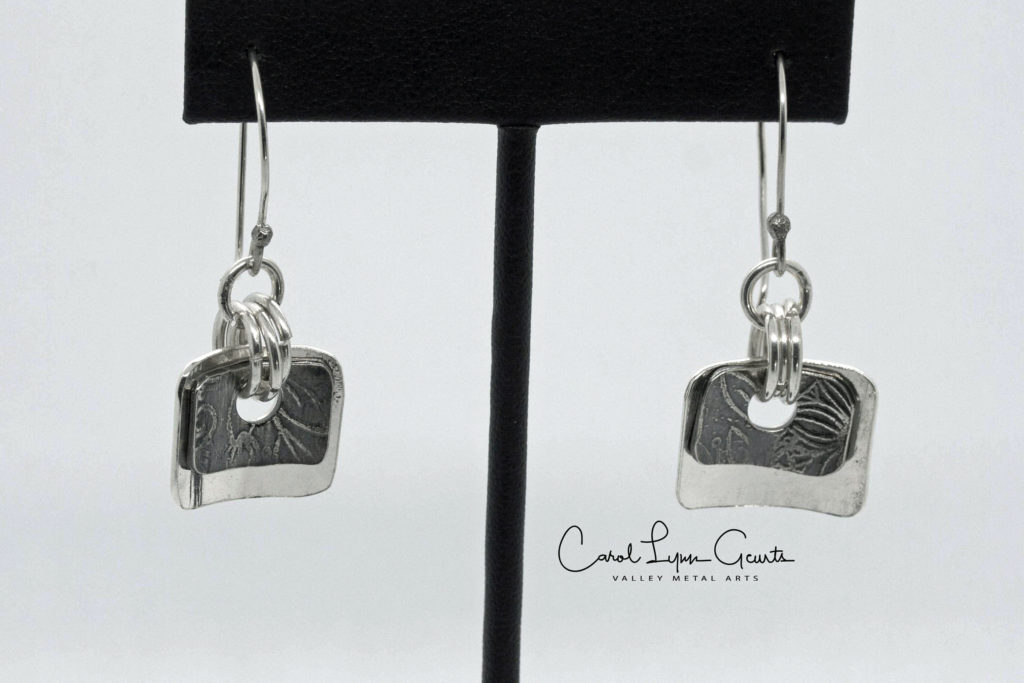
This neck piece was made from the same piece of silver I etched earlier this month, and I love the flowery design. Reminds me Spring will be coming-one day. Doesn’t feel like it right now as we are in the middle of another wintery blast.
While I was at it, did some coordinating earrings.. the ear wires have a nicely rounded style to them that makes keeping them in place super easy.
Don’t you just love the rock??? Another special gift from my dear friend Bettylou. It’s a chunk of Fluorite (known as the rainbow keeper) that has stunning shades of green and purple throughout. Unfortunately when sliced, it crumbles to bits so it is serving it’s purpose as a prop-not the main attraction this time around.