If it involves anything spinning, on fire, or capable of doing major bodily harm-I'm in! All my interest in art has revolved around most things capable of seriously hurting myself-spinning wheels, hot kilns, grinding stones (and nails), cutting and soldering hot metal-love it all! A good friend of mine once said "if you are not living on the edge, you're wasting air..." this is my own personal quest in that regard....
This was the weekend a few pieces came together and were finally finished-I tend to have several projects on the go at any given time and get easily side-tracked…it’s a “bling thing”. This large (and heavy) silver cuff was a challenge with all it’s multiple layers of soldering but it’s almost ready for it’s forever home.I acid etched the sheet silver with a floral background, then shaped and domed the cuff by hand. The stones are soldalite, a beautiful blue with streaks of paler blue and white running through them. Once the cuff was finished, a patina was applied to give it an antique look. I have a nice supply of raw sodalite so will be making more pieces now that I see how well it goes with the antiqued silver. My pieces are not meant to look anything but hand done, so the wearer will see the “marks of the maker” , and hopefully like them just that way.
One more stone to set, a bit of clean-up and this pendant is ready to go. Amethyst is a stone I’ve been working a lot with lately, and I love how well it handles when cutting and polishing, and especially how well it looks set in silver…
This stone is veriegated, fading from dark purple to lighter bands that remind me of rolling hills in fog. I cut out a large part of the back plate to allow light to filter through.
One of my next projects will be to cut some pieces from this gorgeous slab of Sage Amethyst-full of intriguing patterns and colours, can’t wait to see how it looks all cut and polished!
The downside of working with these pieces is at some point I need to part with them–probably the hardest part of what I do. So I’m really excited to have found a local shop that I think is a good fit for us both, and am busy getting some pieces together to “let them go”…. will let you know how that goes ♥
Many years ago when I first tried using an acetylene torch, I spent the day torching the daylights out of some brass that I had previously etched with various patterns. The results of all this labour were lots of horrid looking little pieces of contorted black metal that didn’t turn out quite as I’d envisioned…
This process is called reticulation-the brass is heated to it’s melting point and then all kinds of magic happens-if you are looking for the rugged/molten look. Unfortunately toxic fumes can also be given off, a fact I learned about long after. The ugly “bits” were then stored away, to be long forgotten until 2017.
For whatever reason, I pulled some of these pieces out, in search of some “texture”. I certainly had it in spades with this collection! Since I’d risked life and limb to make the darn things, seemed only fitting to do something with them. I had always been stumped with exactly how to use them-but as my work evolved, so did the opportunities to fit them into my designs. Here is the first piece I used some of the brass in, just love all the mountains, valleys and waves that were created during the torching process:
Pendant with Black Onyx
I was on a roll, and next came a set of earrings with garnet beads, and another pendant, featuring a beautiful Almandine Garnet-a stone I just adore and use frequently in my work.
Reticulated Brass with Garnets
Almandine Garnet Cabochon
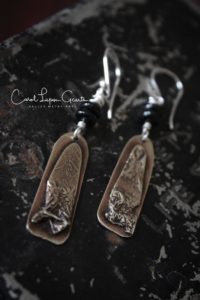
Another set of earrings whose design was dictated by the shape of the melted pieces – they remind me of a Madonna…paired with black heishi beads, I am happy with these ones!
Reticulated Brass Ear Drops
I have more pieces done, awaiting their cabochons..will post when complete. Would love to hear what you think about this process!
I’m finding lots of inspiration with the reticulated silver I’ve been working with this week-now that I have a process for getting good (most of the time) results. It works well with so many designs and pairs great with my stash of semi precious gemstones and rocks. Here are a few that I did:
Raw garnets with garnet bead
Variscite stone
Spinner Earrings
Amethyst Earrings
The metal is fairly tough once it’s done, and bending is almost impossible so no curves on small pieces. However, it’s easy to add bezel settings to and with care, will let you solder on top without turning the thing into a puddle of silver. This one has a hematite stone on it:
If you have silver scraps sitting around, try this and see what you come up with, it’s a great way to create some truly unique components! Here is a great You Tube tutorial that walks you through the process…Happy reticulating!
I began a course late last Fall and after months of interruptions, finally have the pendant finished! This was a real learning curve for me, learning how to work with multi levels of silver, bezel setting, and soldering techniques that nearly drove me batty…and also did some stamping that has opened up some exciting possibilities. Thanks Leslie Kail Villarreal for guiding us through this session with such spectacular results!
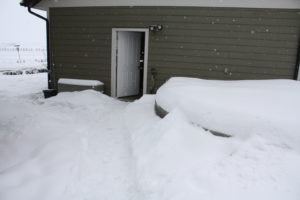
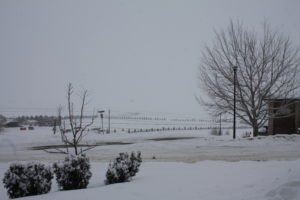
I can see my shop out there-just can’t get to it…we got blessed again last night with another 2′ of snow.
Yesterday
Today
Last May
So in the meantime, here is a piece I finished before the real white stuff arrived:
This is a 2″ agate I cut, leaving the one edge rough and textured. Putting it into a setting was a bit of a challenge because I wanted light to come through as much as possible, and not to cover the textured side. After weeks of sitting on my bench, this is what I came up with-it’s not perfect but I love it! The silver setting took some doing with multiple attachments, using every gauge of solder I own, but everything came out intact including the silver balls, wire prongs, heart and bail-whew! Learned a lot and have some great ideas of what to do with the rest of the cabochons I have sitting in this box:
While most the countryside is being greatly inconvenienced by our late winter weather, I hate to say it, but I’m enjoying every minute of it. The roads are a mess and going anywhere is a challenge-but as long as I can make the 30 feet out to the shop, I’m happy-like really happy!♥♥♥
Yesterday
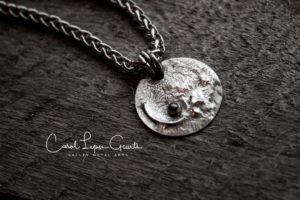
I had an earring design in mind and thought a textured silver circle would be a perfect component-but was looking for something other than etched silver. It’s been a long time since I did any reticulation (melting silver scraps onto copper), so decided this was the weekend to revisit the process.
This article by Kaelin Cordis likens the process to “riding the ragged edge of disaster”..and she’s absolutely spot on. One second too long with the torch in one spot means you have a hole right through the back plate, and a “cooked” mess. Too little heat gives a mediocre texture. Somewhere in the middle is where the magic happens– So here were the results of finding that sweet spot :
I set a hematite cabochon into one, and a garnet in another, pretty happy with the way these turned out-unpredictable but today was a good day!..and I only “cooked ” the first piece.
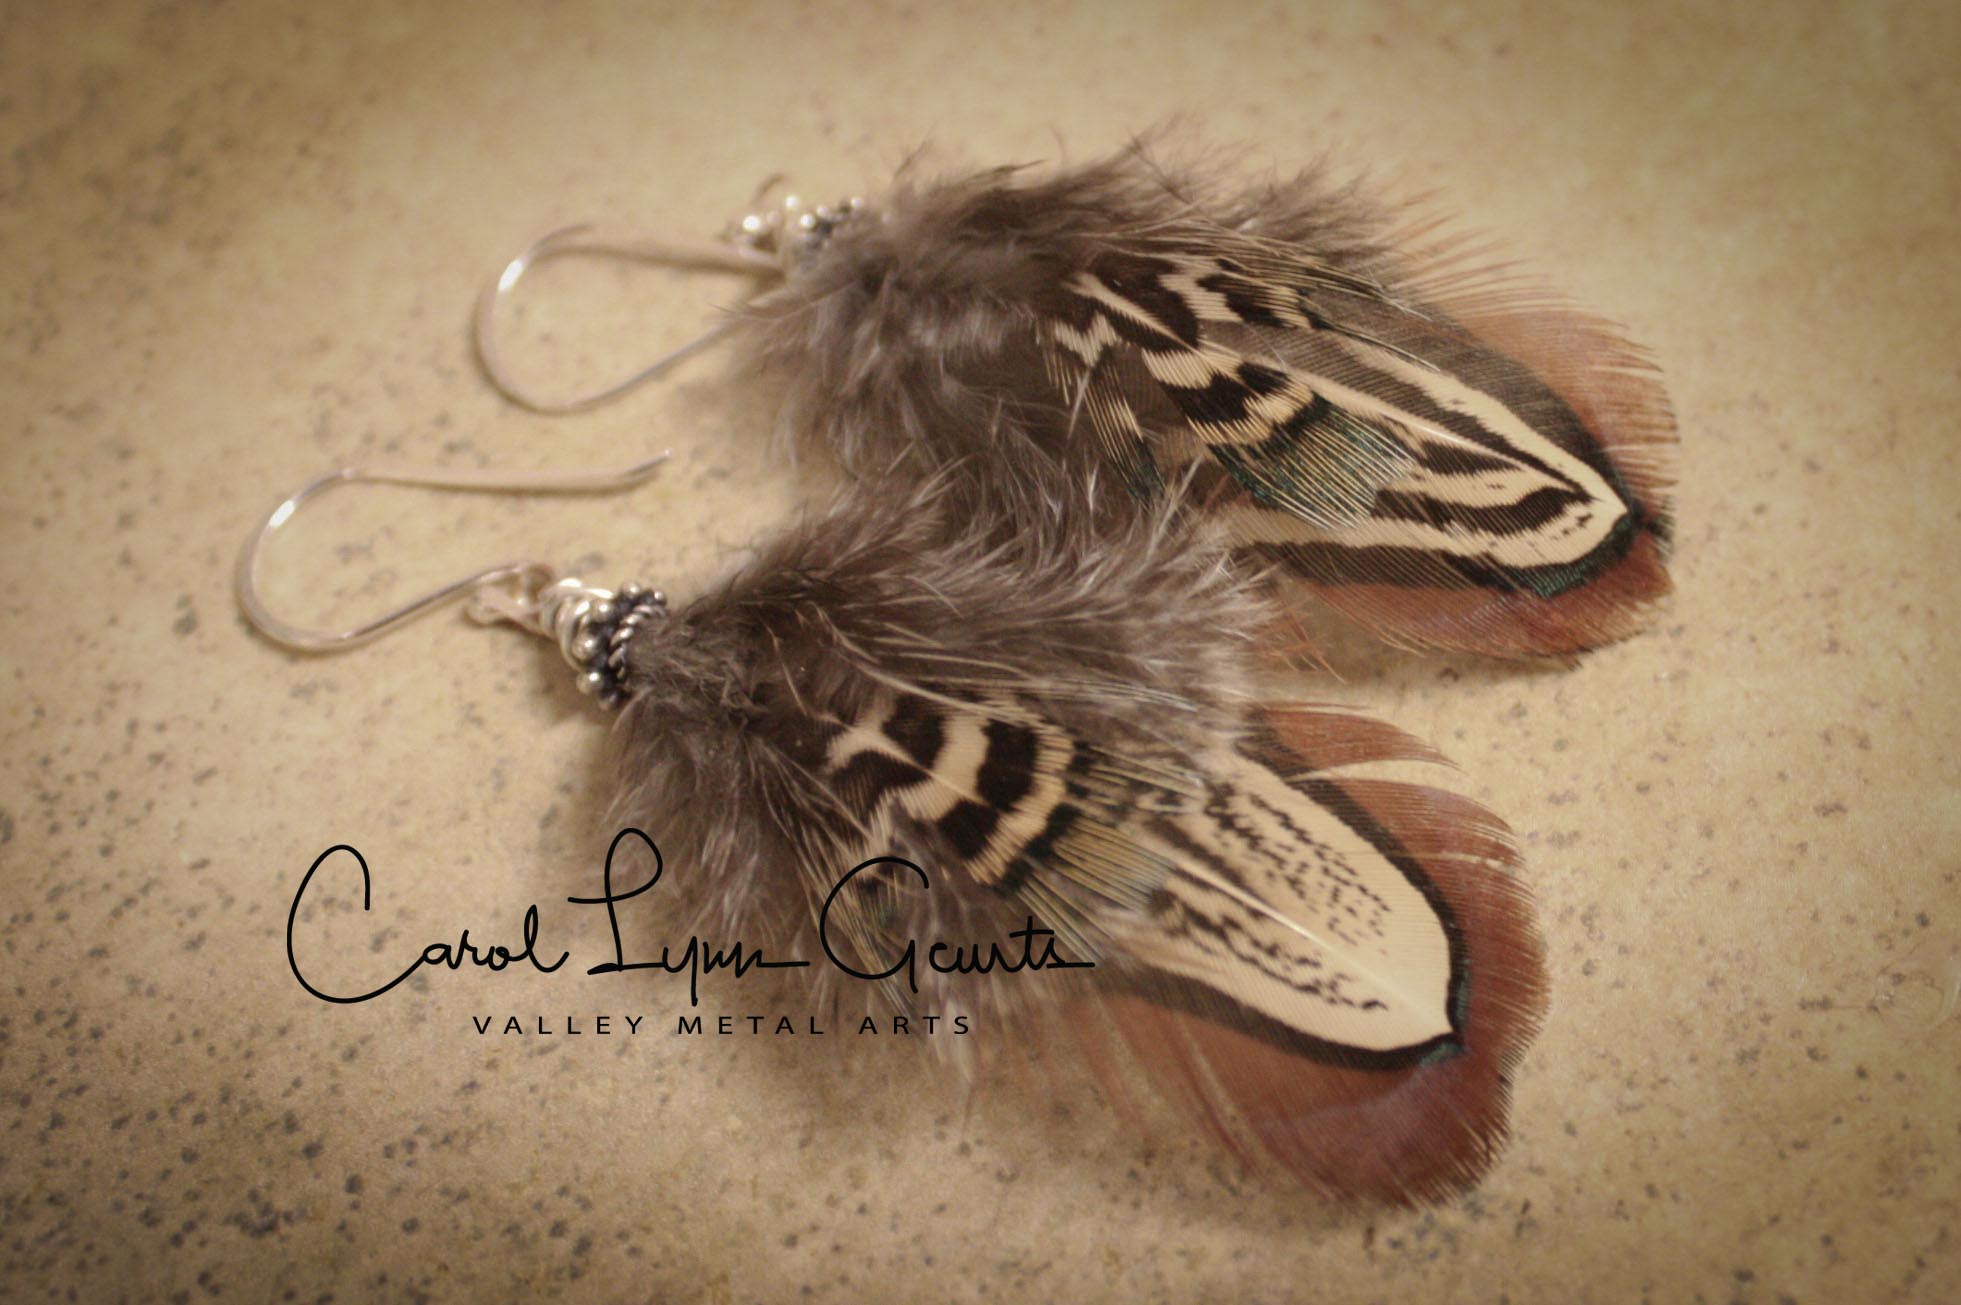
A request from our local business EyeCandy Esthetics brought me here-up to my knees in feathers…I have an whole new appreciation of them these days. I adore the stunning beauty of the colours and the subtle luminescence of each and every one. They are mini works of art all on their own.
What I didn’t appreciate was what the challenges of me working with them would look like-full facial mask, goggles and an air purifier-rather like a mini hazmat team happening here. I’d forgotten I was allergic to feathers…just got caught up in the excitement of it all and before I knew it-there I was.
It was worth it all-I am so enchanted with the end results, am going to try wearing a pair tomorrow…will let you know how that idea goes….or not.
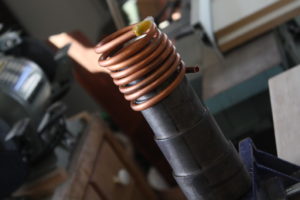
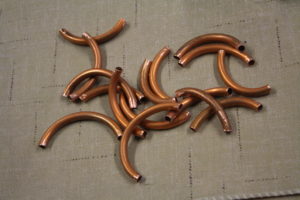
OK-I know most of you have absolutely no clue why I am soooo excited about this…and no, it’s not a moonshine still component (altho it definitely could be…). Just figured out how to bend copper tubing without collapsing the walls. (Thank you YouTube!). It involved filling tubing with water and freezing before wrapping it around something curved. Since it was -17 degrees here today, the freezing part was easy!
Once everything was frozen,(less than an hour) I wrapped it around a cuff mandrel and voila–curved copper with no kinks or flat spots! Took a few minutes to saw into 2 inch pieces, sand the edges and I was done. All ready for my next class-can you guess what these will be used for?
Hint- Valentines Day is just over a month away… stay tuned!
This cuff came back to me for a rivet repair and I was amazed at the condition it was in. It had been worn and loved nearly to death..and I was thrilled! Glad to know someone likes it that much ♥.
A bit of polishing and buffing and it looks better than new-way better! It looks loved-
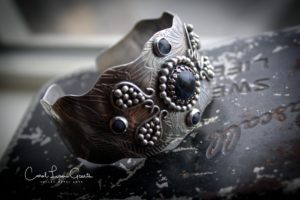 I acid etched the sheet silver with a floral background, then shaped and domed the cuff by hand. The stones are soldalite, a beautiful blue with streaks of paler blue and white running through them. Once the cuff was finished, a patina was applied to give it an antique look. I have a nice supply of raw sodalite so will be making more pieces now that I see how well it goes with the antiqued silver. My pieces are not meant to look anything but hand done, so the wearer will see the “marks of the maker” , and hopefully like them just that way.
 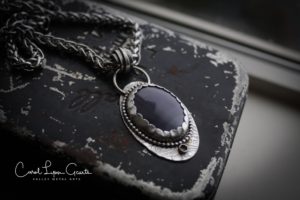 This stone is veriegated, fading from dark purple to lighter bands that remind me of rolling hills in fog. I cut out a large part of the back plate to allow light to filter through.
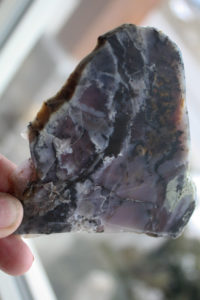
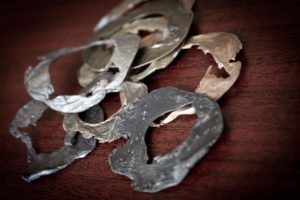 This process is called reticulation-the brass is heated to it’s melting point and then all kinds of magic happens-if you are looking for the rugged/molten look. Unfortunately toxic fumes can also be given off, a fact I learned about long after. The ugly “bits” were then stored away, to be long forgotten until 2017.
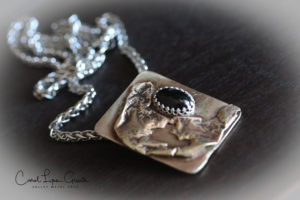


 If you have silver scraps sitting around, try this and see what you come up with, it’s a great way to create some truly unique components! Here is a great You Tube


 Hint- Valentines Day is just over a month away… stay tuned!
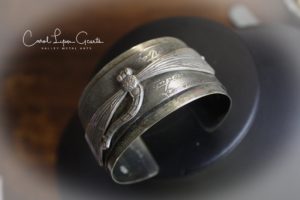 A bit of polishing and buffing and it looks better than new-way better! It looks loved-