Category Archives: Uncategorized

Dangles of Yumminess

This slideshow requires JavaScript.

Can’t believe I forgot to include these in my post earlier…I might forget my kid’s birthdays and where I left my car…but not my newest  bling….  I started with come copper wire that I shaped into – well,  not sure they have a name.  Like a partial circle with tabbed ends with holes punched through.  Anyhow, I beaded up the ends of some Sterling silver wire and wound it around the copper base-no rhyme nor reason, just because.  From my stash I used 2 luscious jet black Swarovski  crystal briolette beads, wrapped THOSE with more silver wire and then added silver ear wires.  The whole works just kind of came together and I lov’em….

They swing, dance and dangle and did I say I lov’em?…cause I really do! Not sure these will make it to my online Etsy store – if you live in the Creston area and are interested, $35 and they can be on your ears tomorrow:).


Thanks for coming by-love blogging almost as much as melting/pounding/beating on metal ♥♥♥

Ear Candy !

These gorgeous little green glass rondelle beads have been languishing for several years in one of my boxes of stuff…I know, I know….I just didn’t know quite what to do with ’em.  This weekend a tiny 2″ piece of brass provided that final link, and this is where they ended up.  They whirl, and twirl and are just so fun.  It’s taking every ounce of restraint not to keep them-I am terrible at letting my work go, but am working on that.  Really hard….honest.

Long story on these guys-got my hands on an acetylene torch last year-burns stinkin’ hot.  It melts metal-even brass.  So I did a huge lot of “reticulation” (fancy word for melted metal)..and then had no idea what to do with the stuff.  Looked “interesting” but that’s as far as my brain went.  This week I figured out I could re-shape and play, not just work with the original challenging shapes. These irregular teardrop shapes look like cocoons-not at all intended, but sometimes things just turn out the way they want to…I took sterling silver wire and did some wraps and twists, added sterling ear wires-and we’re done!  Oh-also added some of my most favourite beads-Swarovski Golden Bronze briolettes. (Another fancy name for squashed cushion beads)….

And just a few more,  until now, forgotten gems…These little beauties are moss agates, can you see how the sunlight comes through?  This is one of my all time favourite stones to work with- am I repeating myself???  But they really are, still have the first stone I cut nearly 40 years ago- yup, moss agate. These guys are paired with layers of Keishi fresh water pearls-love, love, love these little lumpy disks of lusciousness.  And of course I had to top them all off with another Swarovski crystal-can never have enough sparkle..or bling..

These will be posted for sale in my Etsy Store but if interested, PM me for pricing any time.

Thanks for hanging in there to get this far in this wordy post–come back again soon!

Cheers!

Carol

Tutorial – Etching My Way

Several folks on my Homesteading Group asked for more details on my etching method, so here it is. Please note this is the way I do it, but I’m sure there are a hundred variations out there. This session assumes you already are familiar with etching and all the safety precautions needed.

I get my brass pre-cut into 6×36″ strips and it’s plastic sheet-protected.  I cut off the size I want -11X6″ fits perfectly into my ferric chloride tub so that’s what I am working with here. I remove the protective cover and then scrub with a green scrubby to give the metal some  “tooth” for the stamping to grab onto.  I then clean the surface with Acetone to make sure there are no fingerprints or oil left on the surface….none.  nada.

The stamping part is easy-I use quick, random stampings with StazOn Ink or create my own with a Sharpie marker.  Letting this dry is crucial-ask me how I know.

I use the blue painters tape to cover the back of my metal-any color will do but I like the strength and hold this one has, plus it shows up well on photos!  I carefully ease it into the ferric chloride tub and secure at each end so it doesn’t slip down to the bottom of the liquid. Now you wait.  Today was a nice day here, but not too hot. The temperature and age of your solution will determine the correct etching time.   My etch was done in 40 minutes-you test it by lifting one end and running a gloved finger over the metal to see if the etch can be felt.

Take the metal out of the etchant, dip into a water bath, remove the masking tape,  and scrub with a brass brush and baking soda until the ink is removed and the ferric chloride is neutralized.  I can’t stress enough how important it is to wear protective clothing and gloves, and keep everything  covered that you do not want stained–unless you love bright yellow.


This is the finished product.  I let it air dry and the proceed to cut, anneal and shape.

I’d be remiss without mentioning how to dispose of the water you washed the metal in.  I wait until the metal has settled to the bottom of the wash pan, pour off the clear section, then leave the remainder to air dry.  Once that is done, I dump it into a plastic-lined bucket and when full, take it to our recycling yard  where they have special disposal available.  You don’t want this getting into the water system, and this method is easy to manage.

Cuff Bending Contraption…

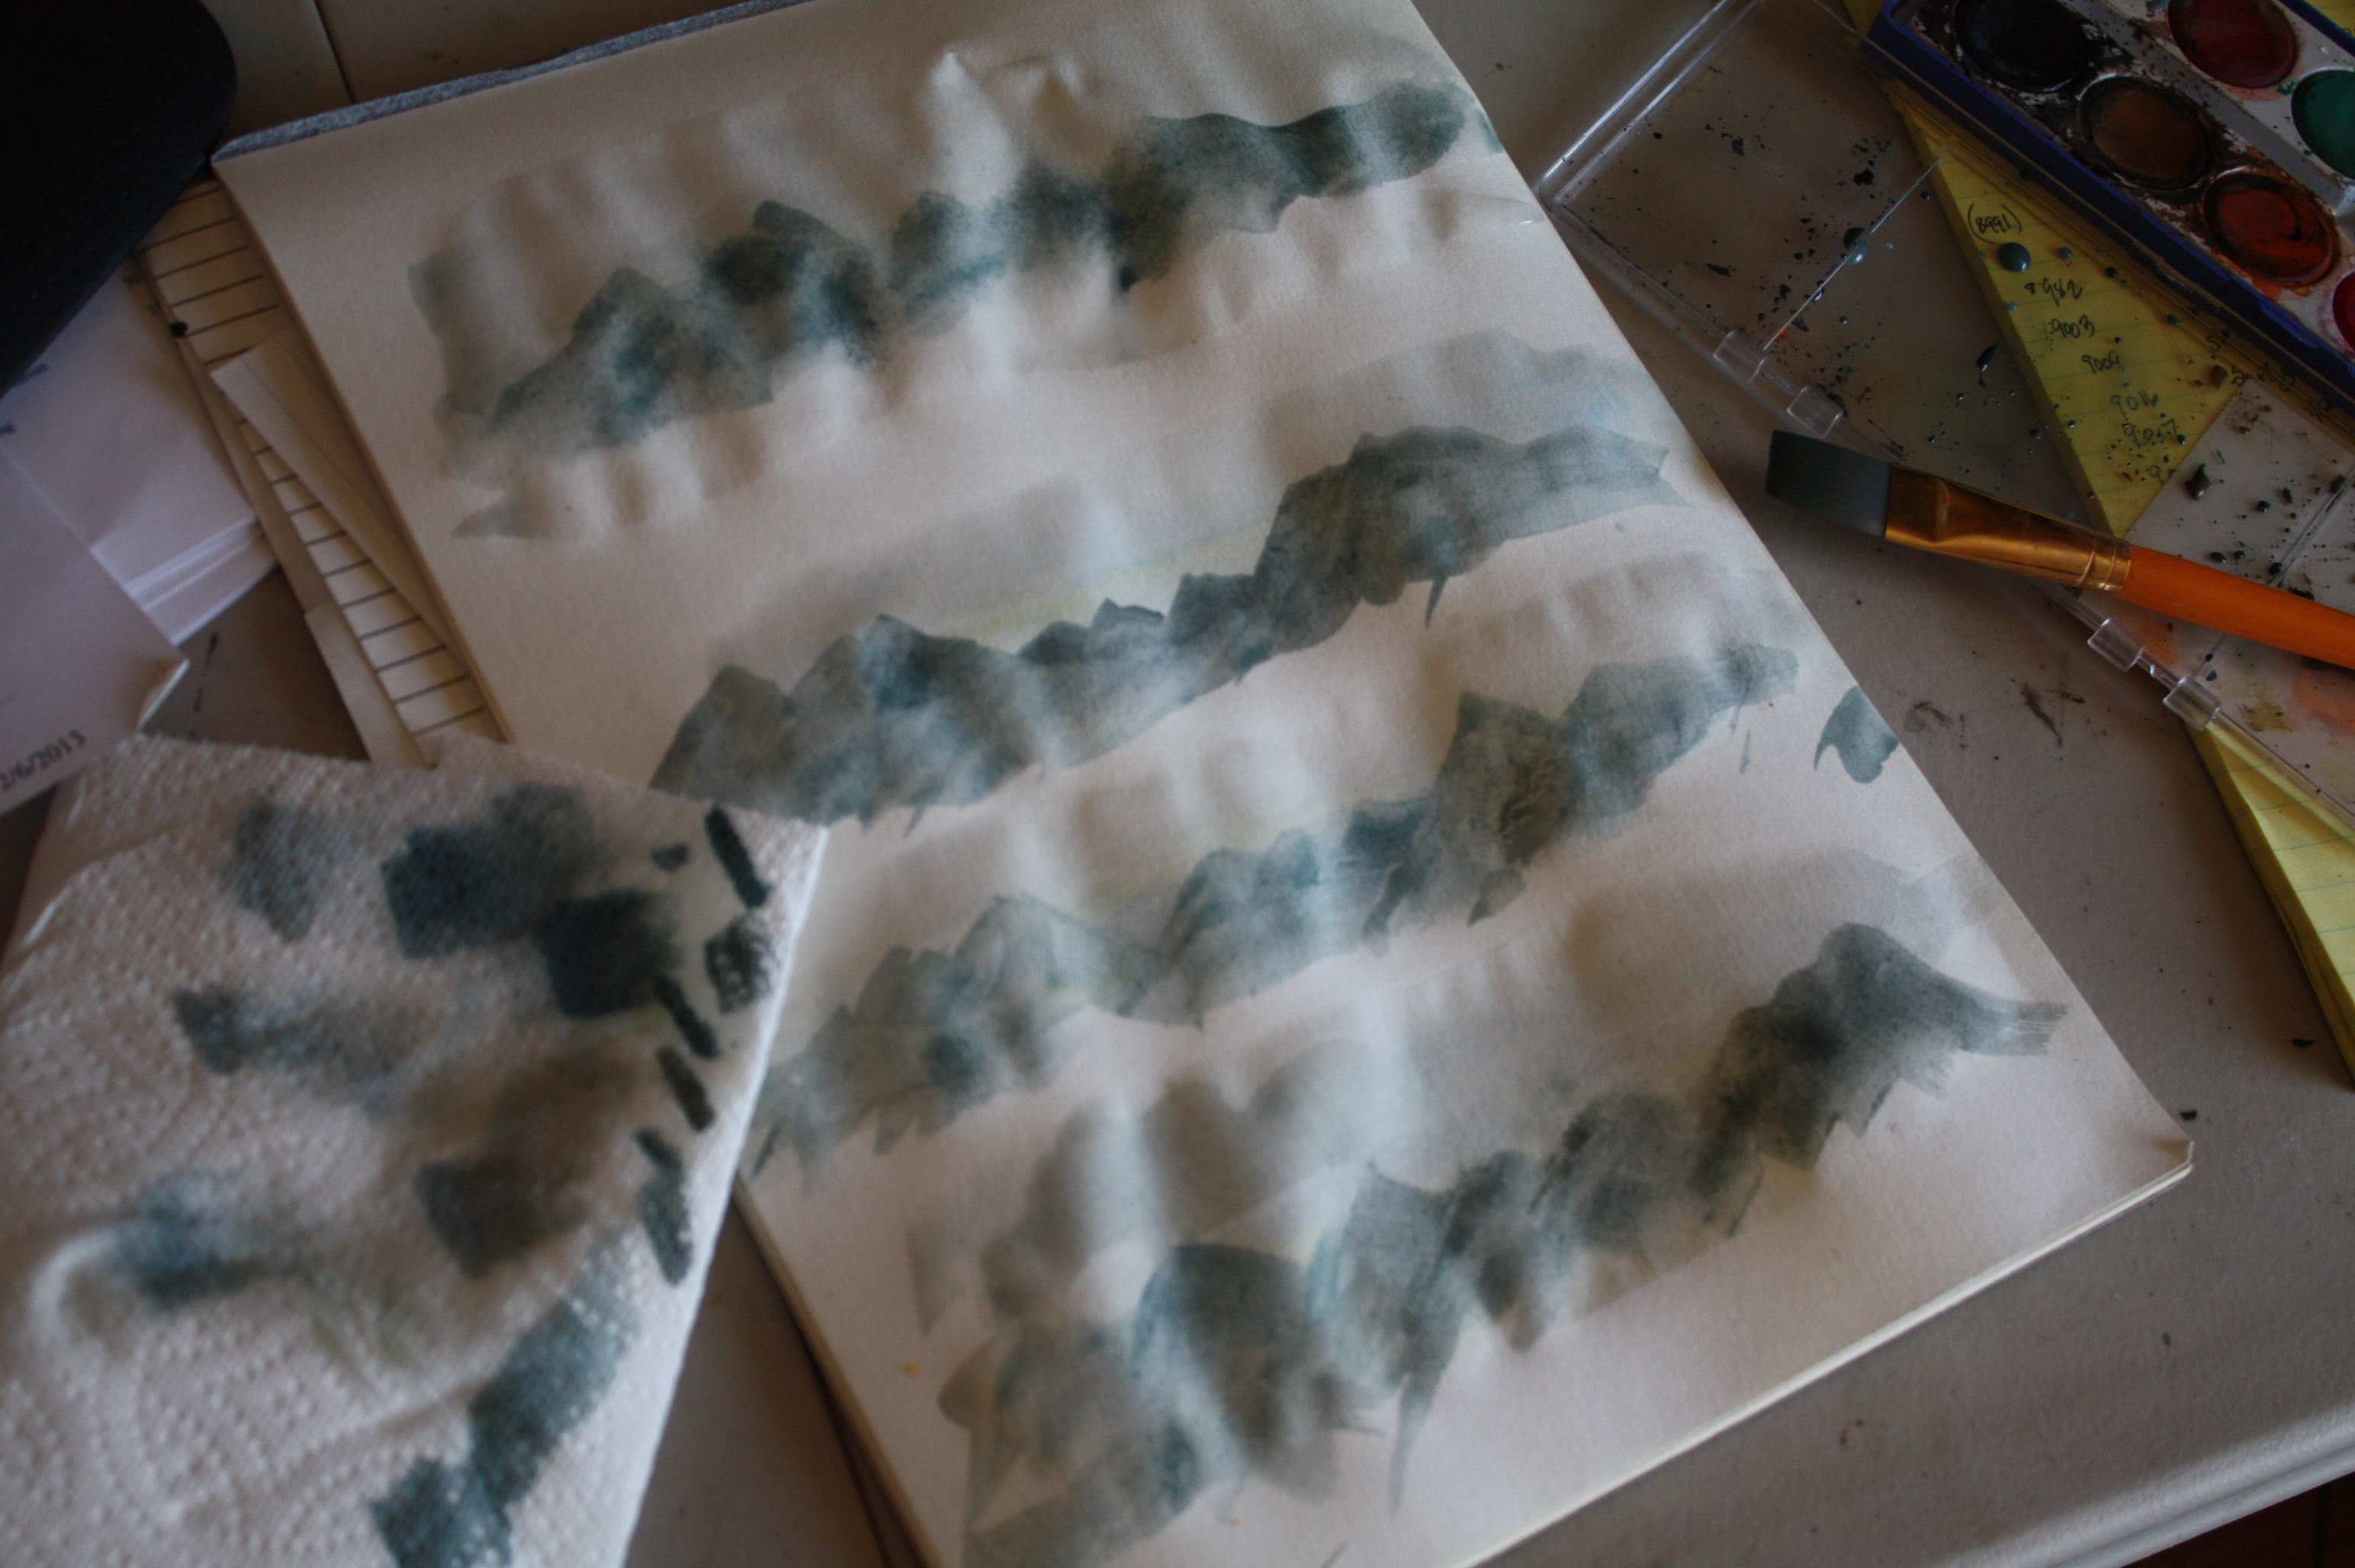
My apologies for the late posting of this-my 2 1/2 year old grandson and his Mom drove for 2 days (from Dawson Creek) to surprise me with a Mom’s Day visit…everything got put on hold while we just enjoyed every second of our time together…7 days just flew by at warp speed.

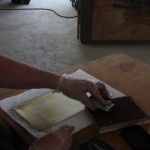
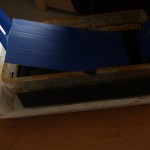
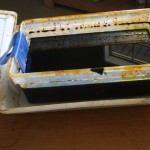
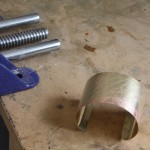
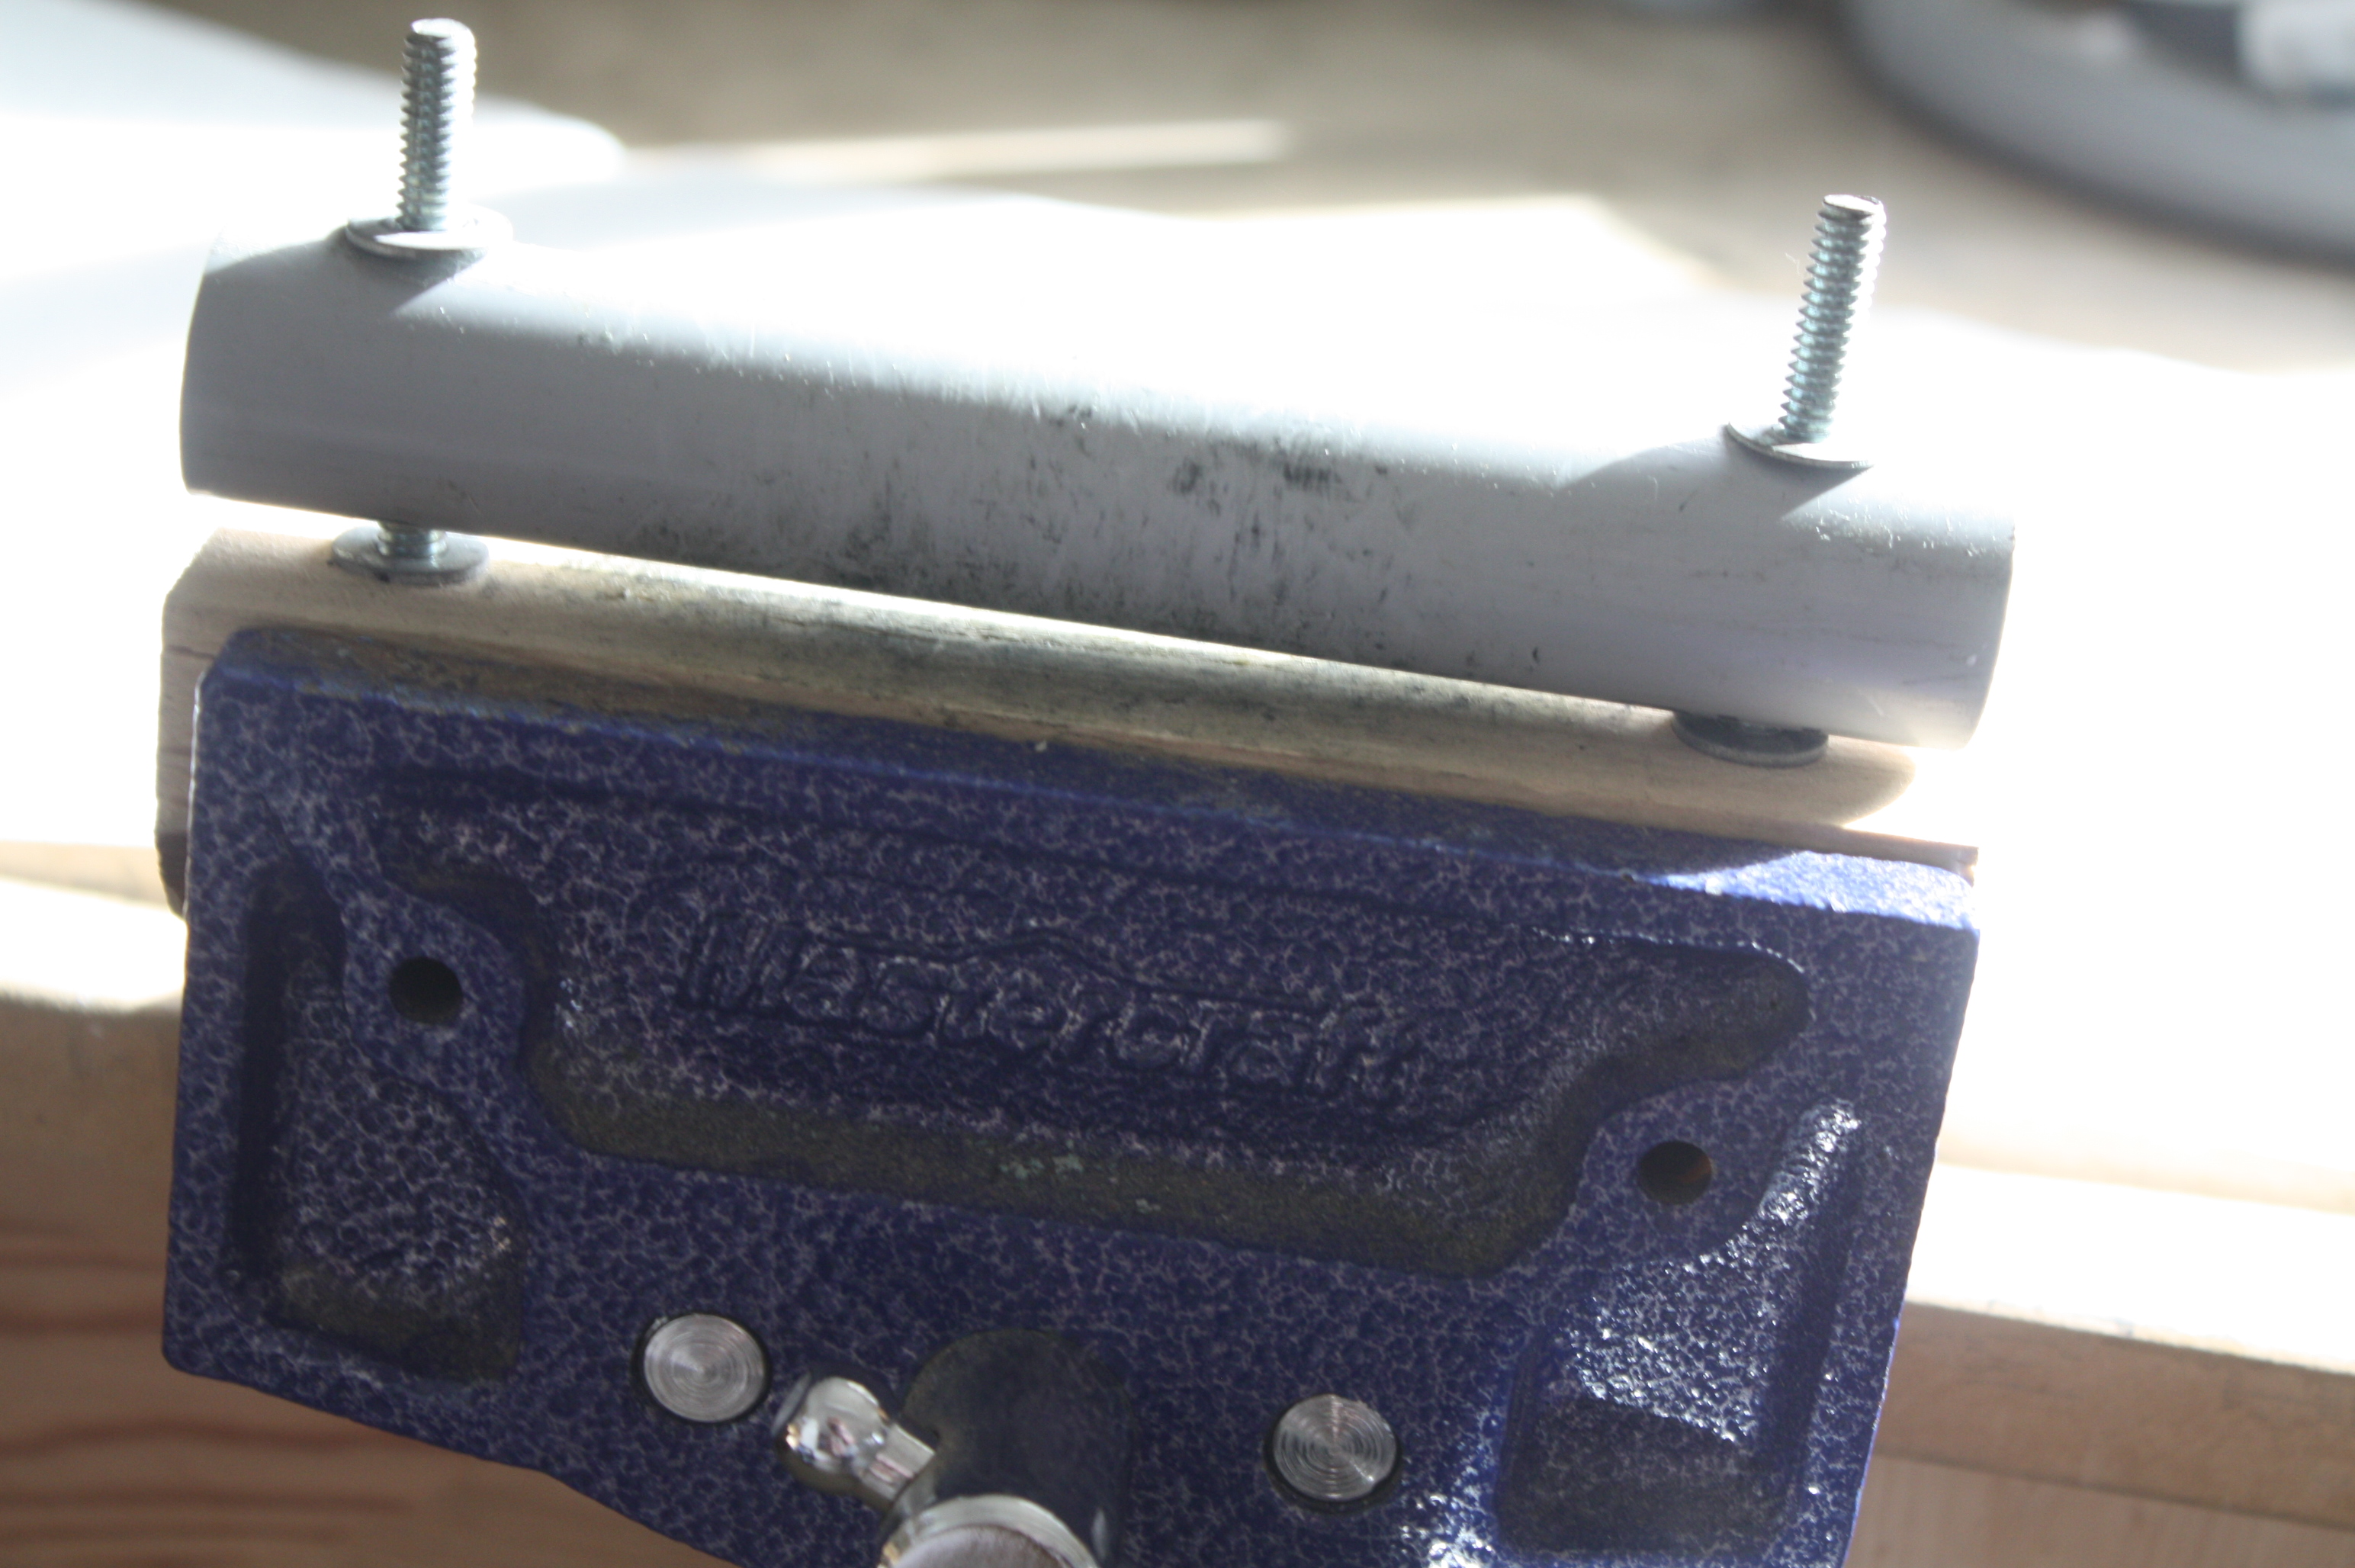
Ok- here we go.  Did not have time to construct this from scratch so I de-constructed my existing “Bender” or Bea  as I call her……To start with, get yourself a vice (no-not wine….)…and install it onto something solid.  Mine is just attached with clamps to my work bench.

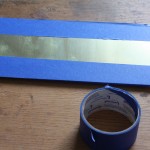
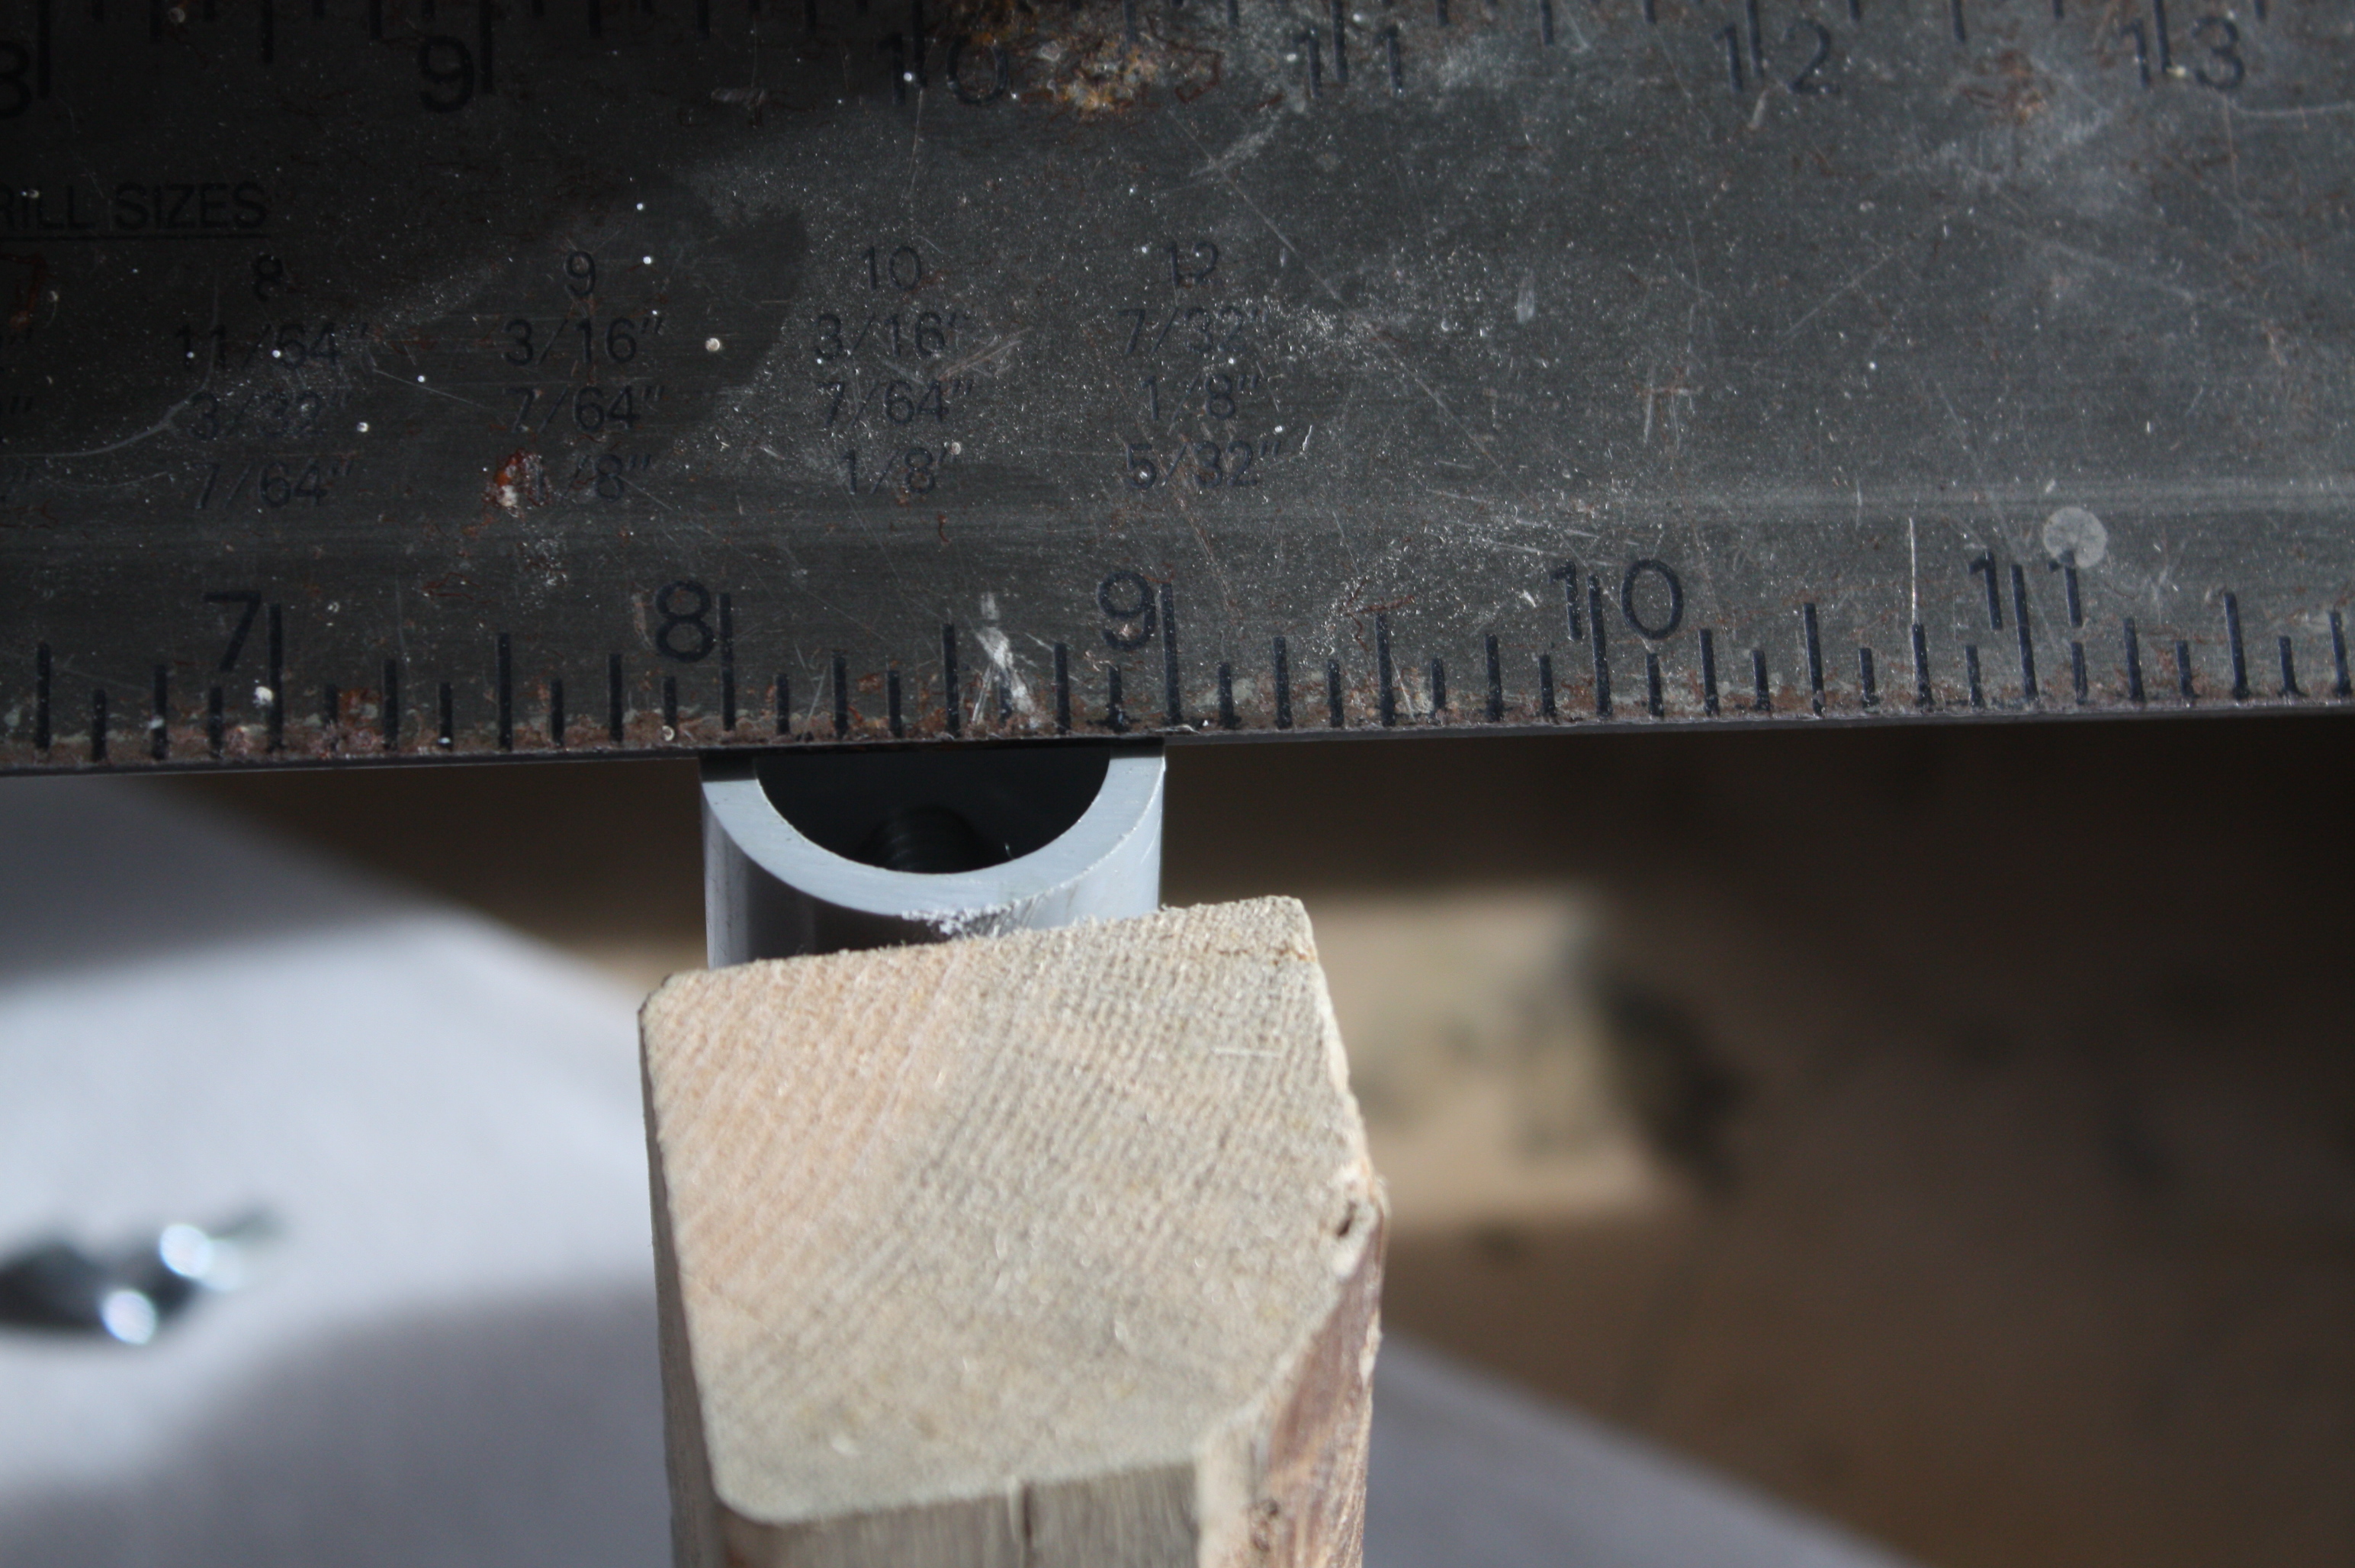
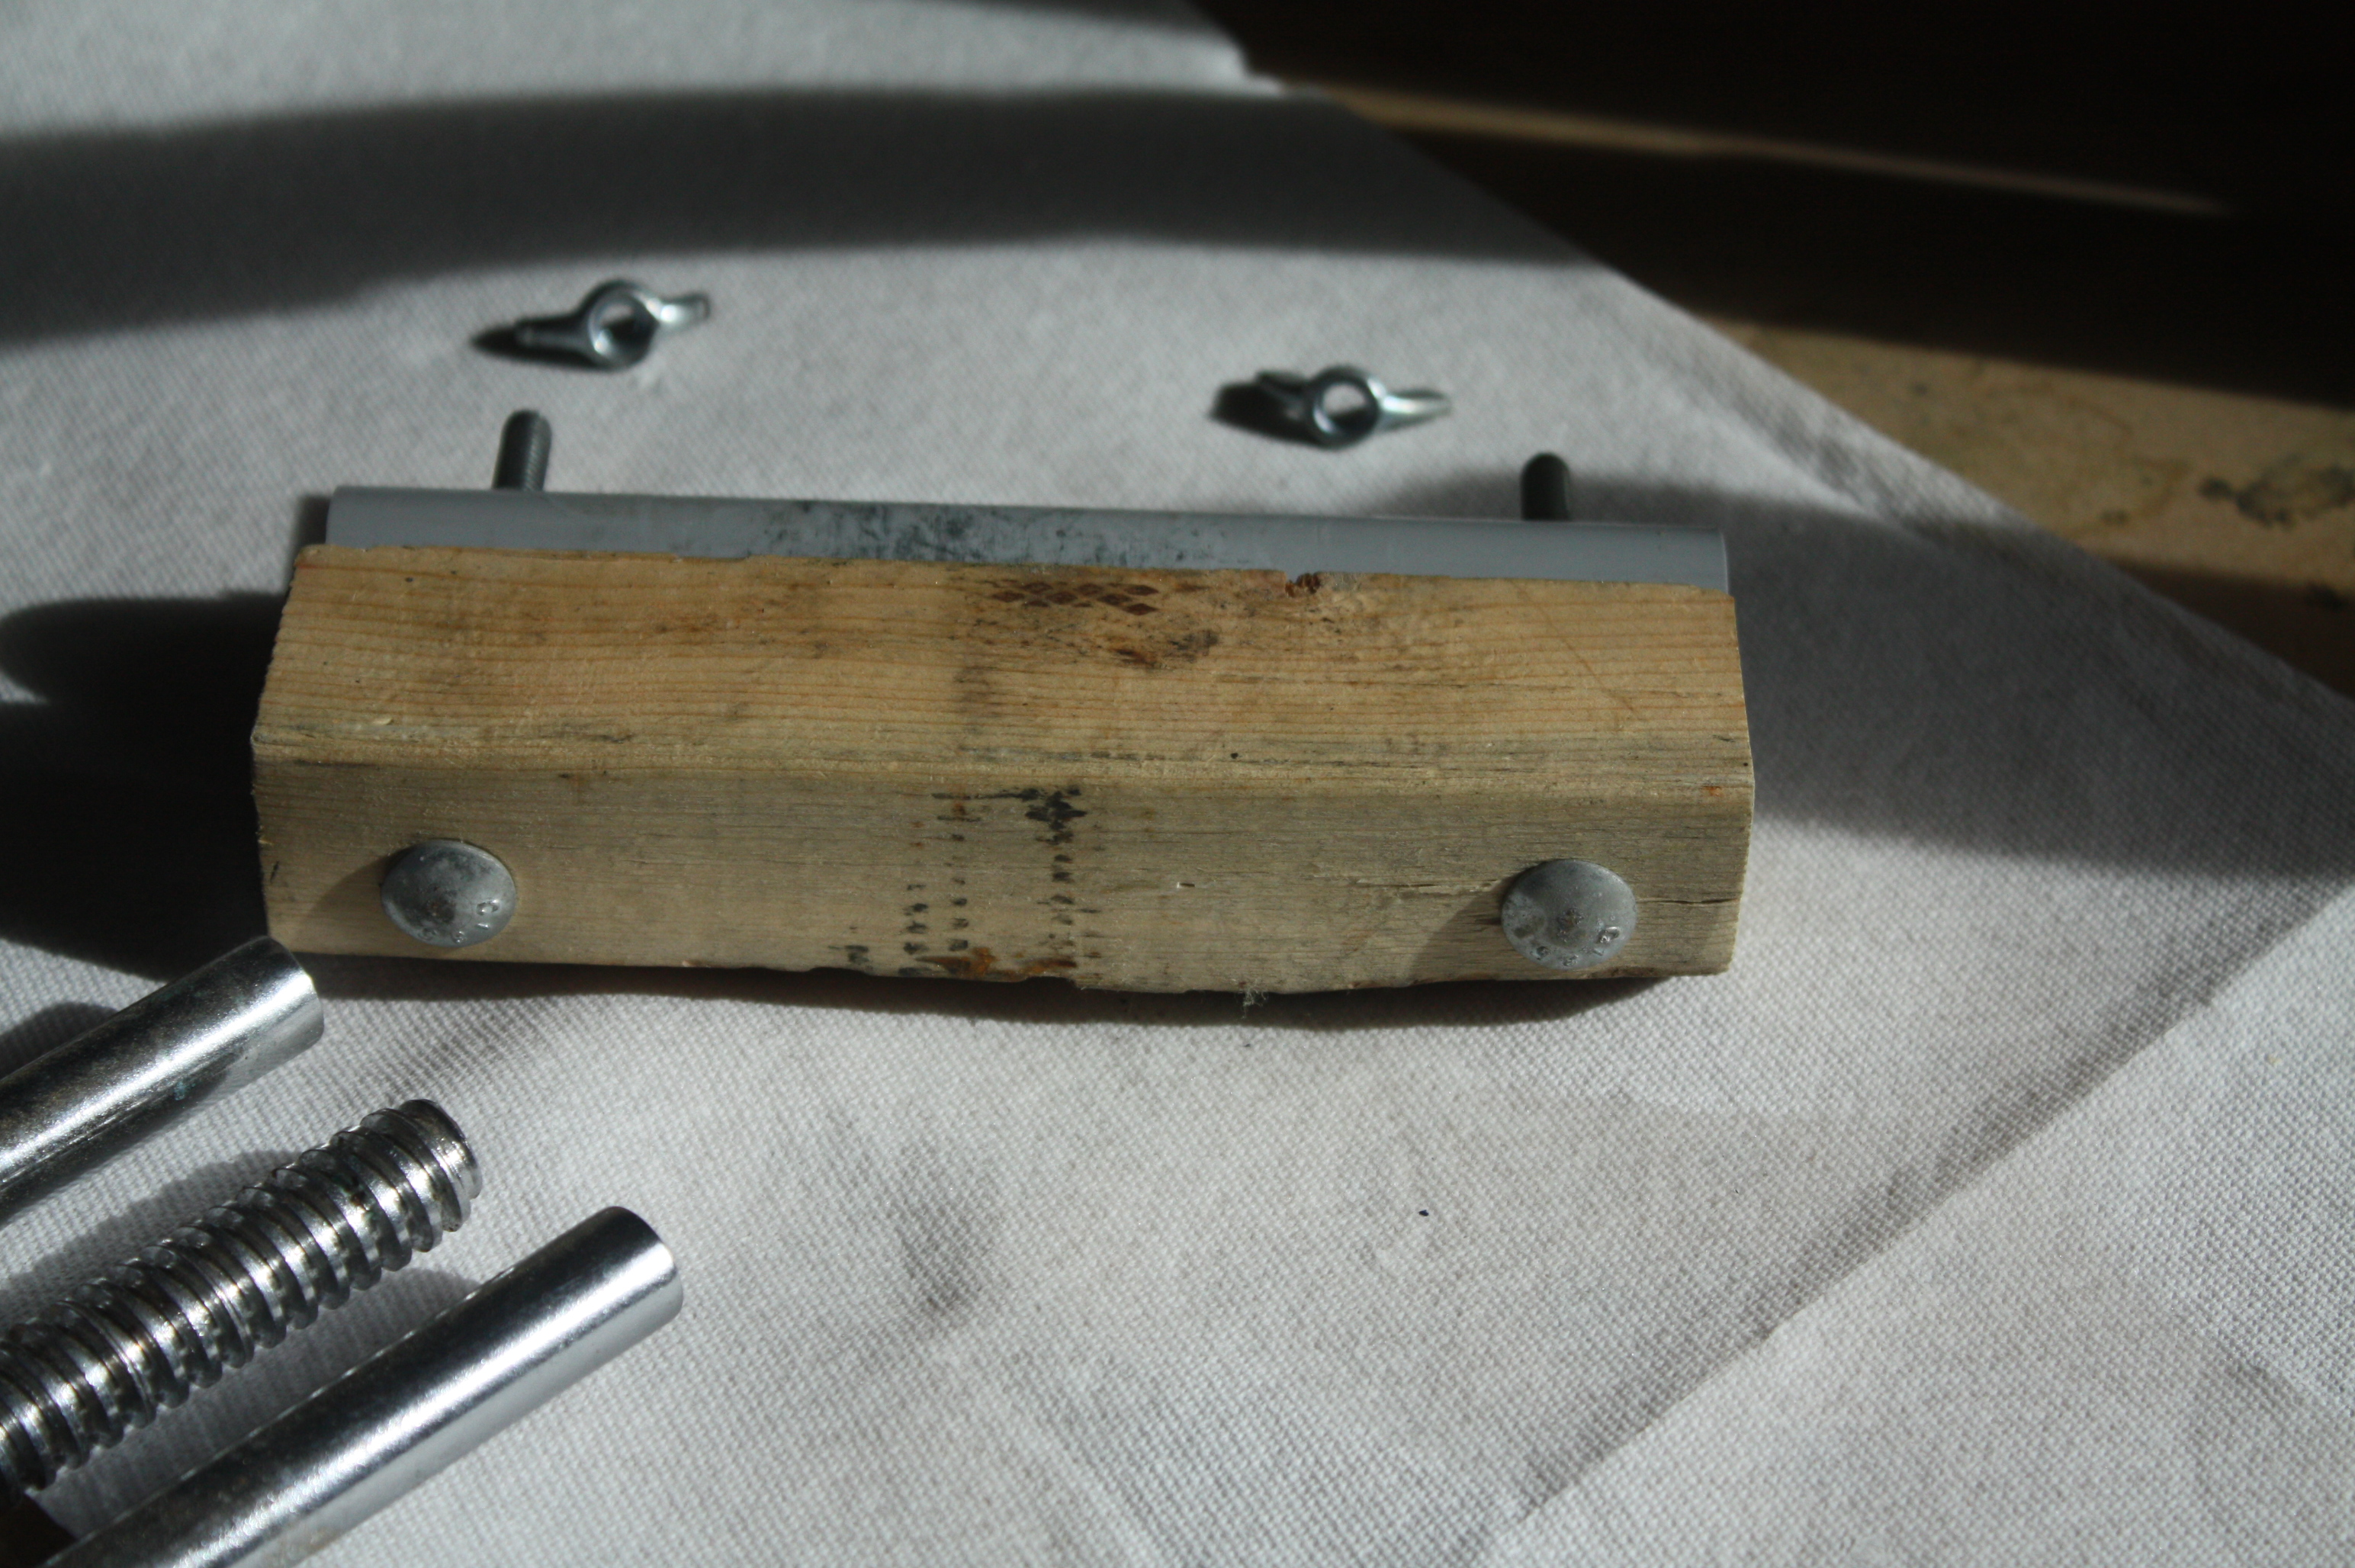
Next you will need a 6 inch long chunk of wood-I used a 2×4 cut in half length-wise, to make it 6x2x2….  This is where friends with wood-working skills come in handy….at the same time, rustle up a 6″ piece of plastic PVC pipe, 1″ in diameter. (My wood looks wonky because it was a reject or whatever you call not perfectly square 2x4s…)

IMG_0316


IMG_0313


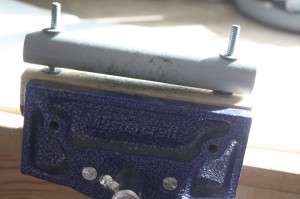
Yup-1″…or 152 mm.  Or something close-or not.  While you are at it, get yourself  a couple bolts with wing nuts, about 3 +/-  inches long


IMG_0312 IMG_0311
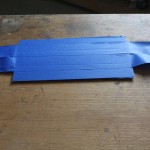
Drill a hole  through the wood at each end, large enough to fit the bolt through.  Drill through the PVC pipe as well-same spacing.  Then thread the bolt through both and secure with the wing nut.


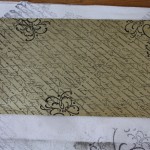
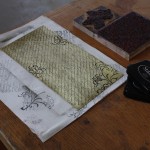
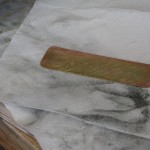
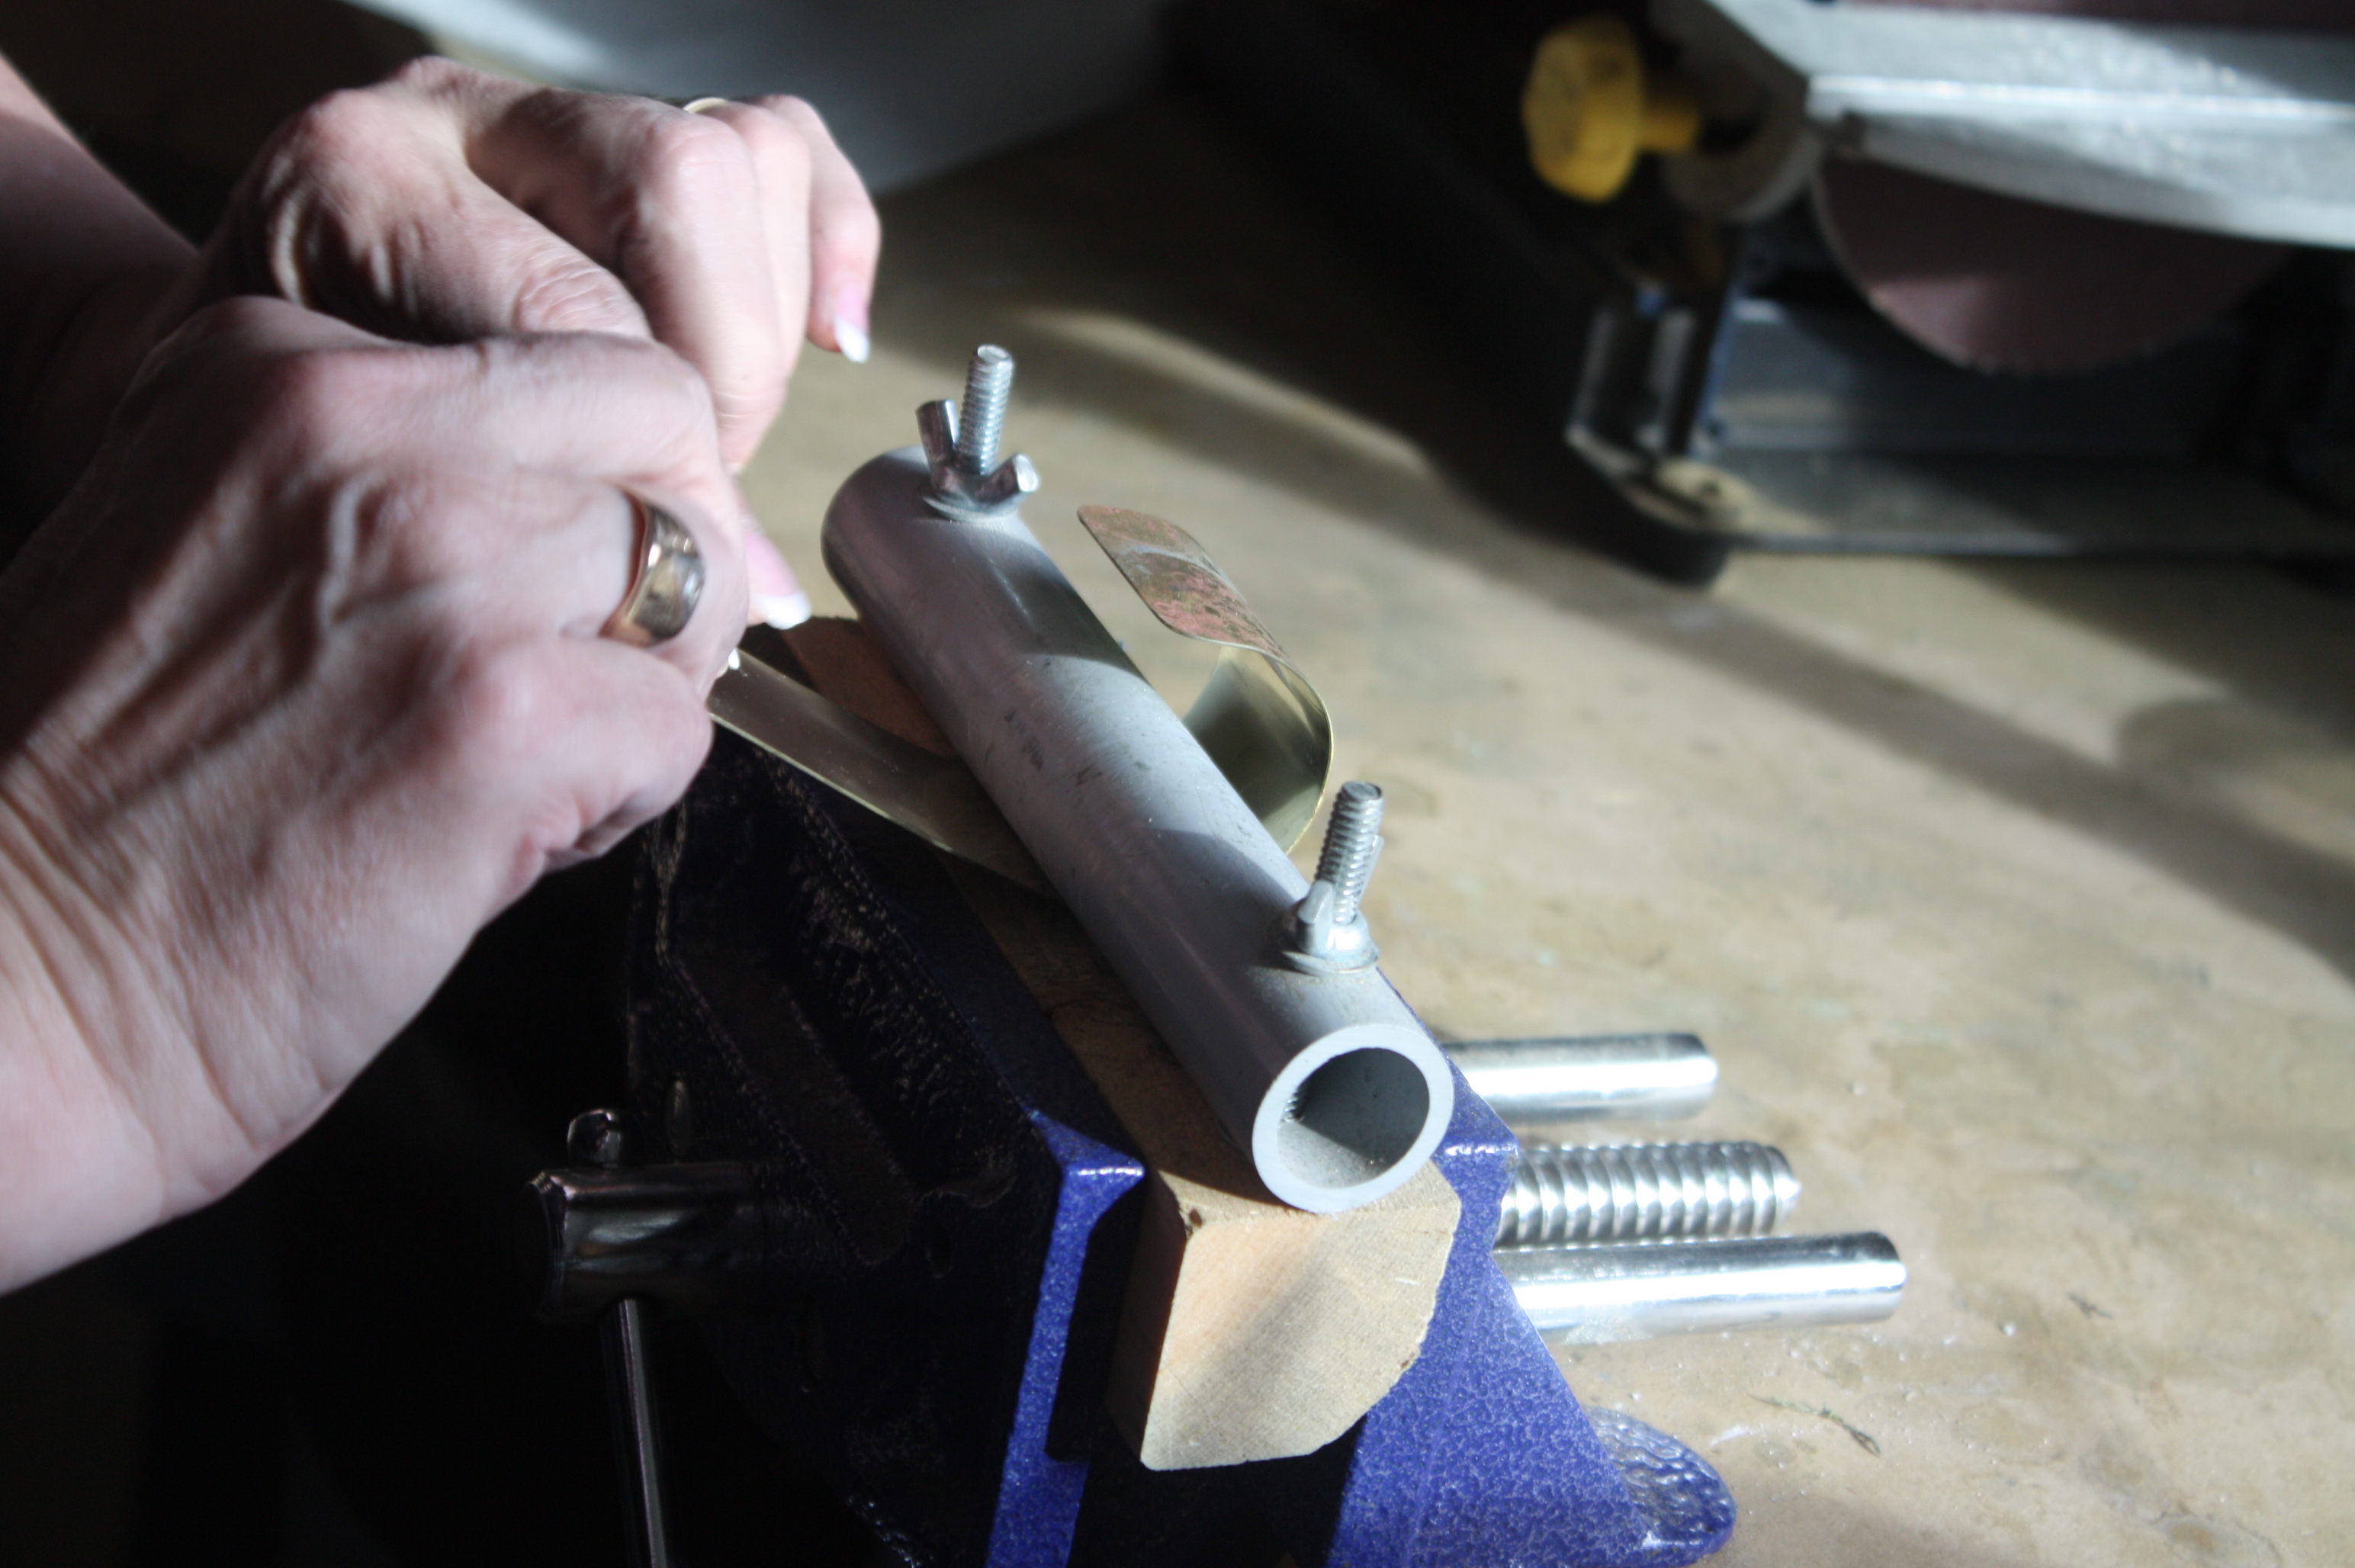
That’s pretty much all there is folks-tighten or loosen the bolt to adjust to you metal thickness…then practice feeding your cuff plates though and gently bending a little with each push.


IMG_0044

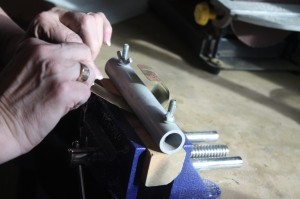
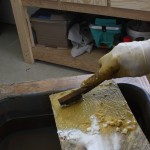
The secret to all of this is make sure your metal is sufficiently annealed..if you have to force it, will drive you crazy, and not form properly.  Go slow, and play lots- it takes some practice and remember that everything is “fixable”…


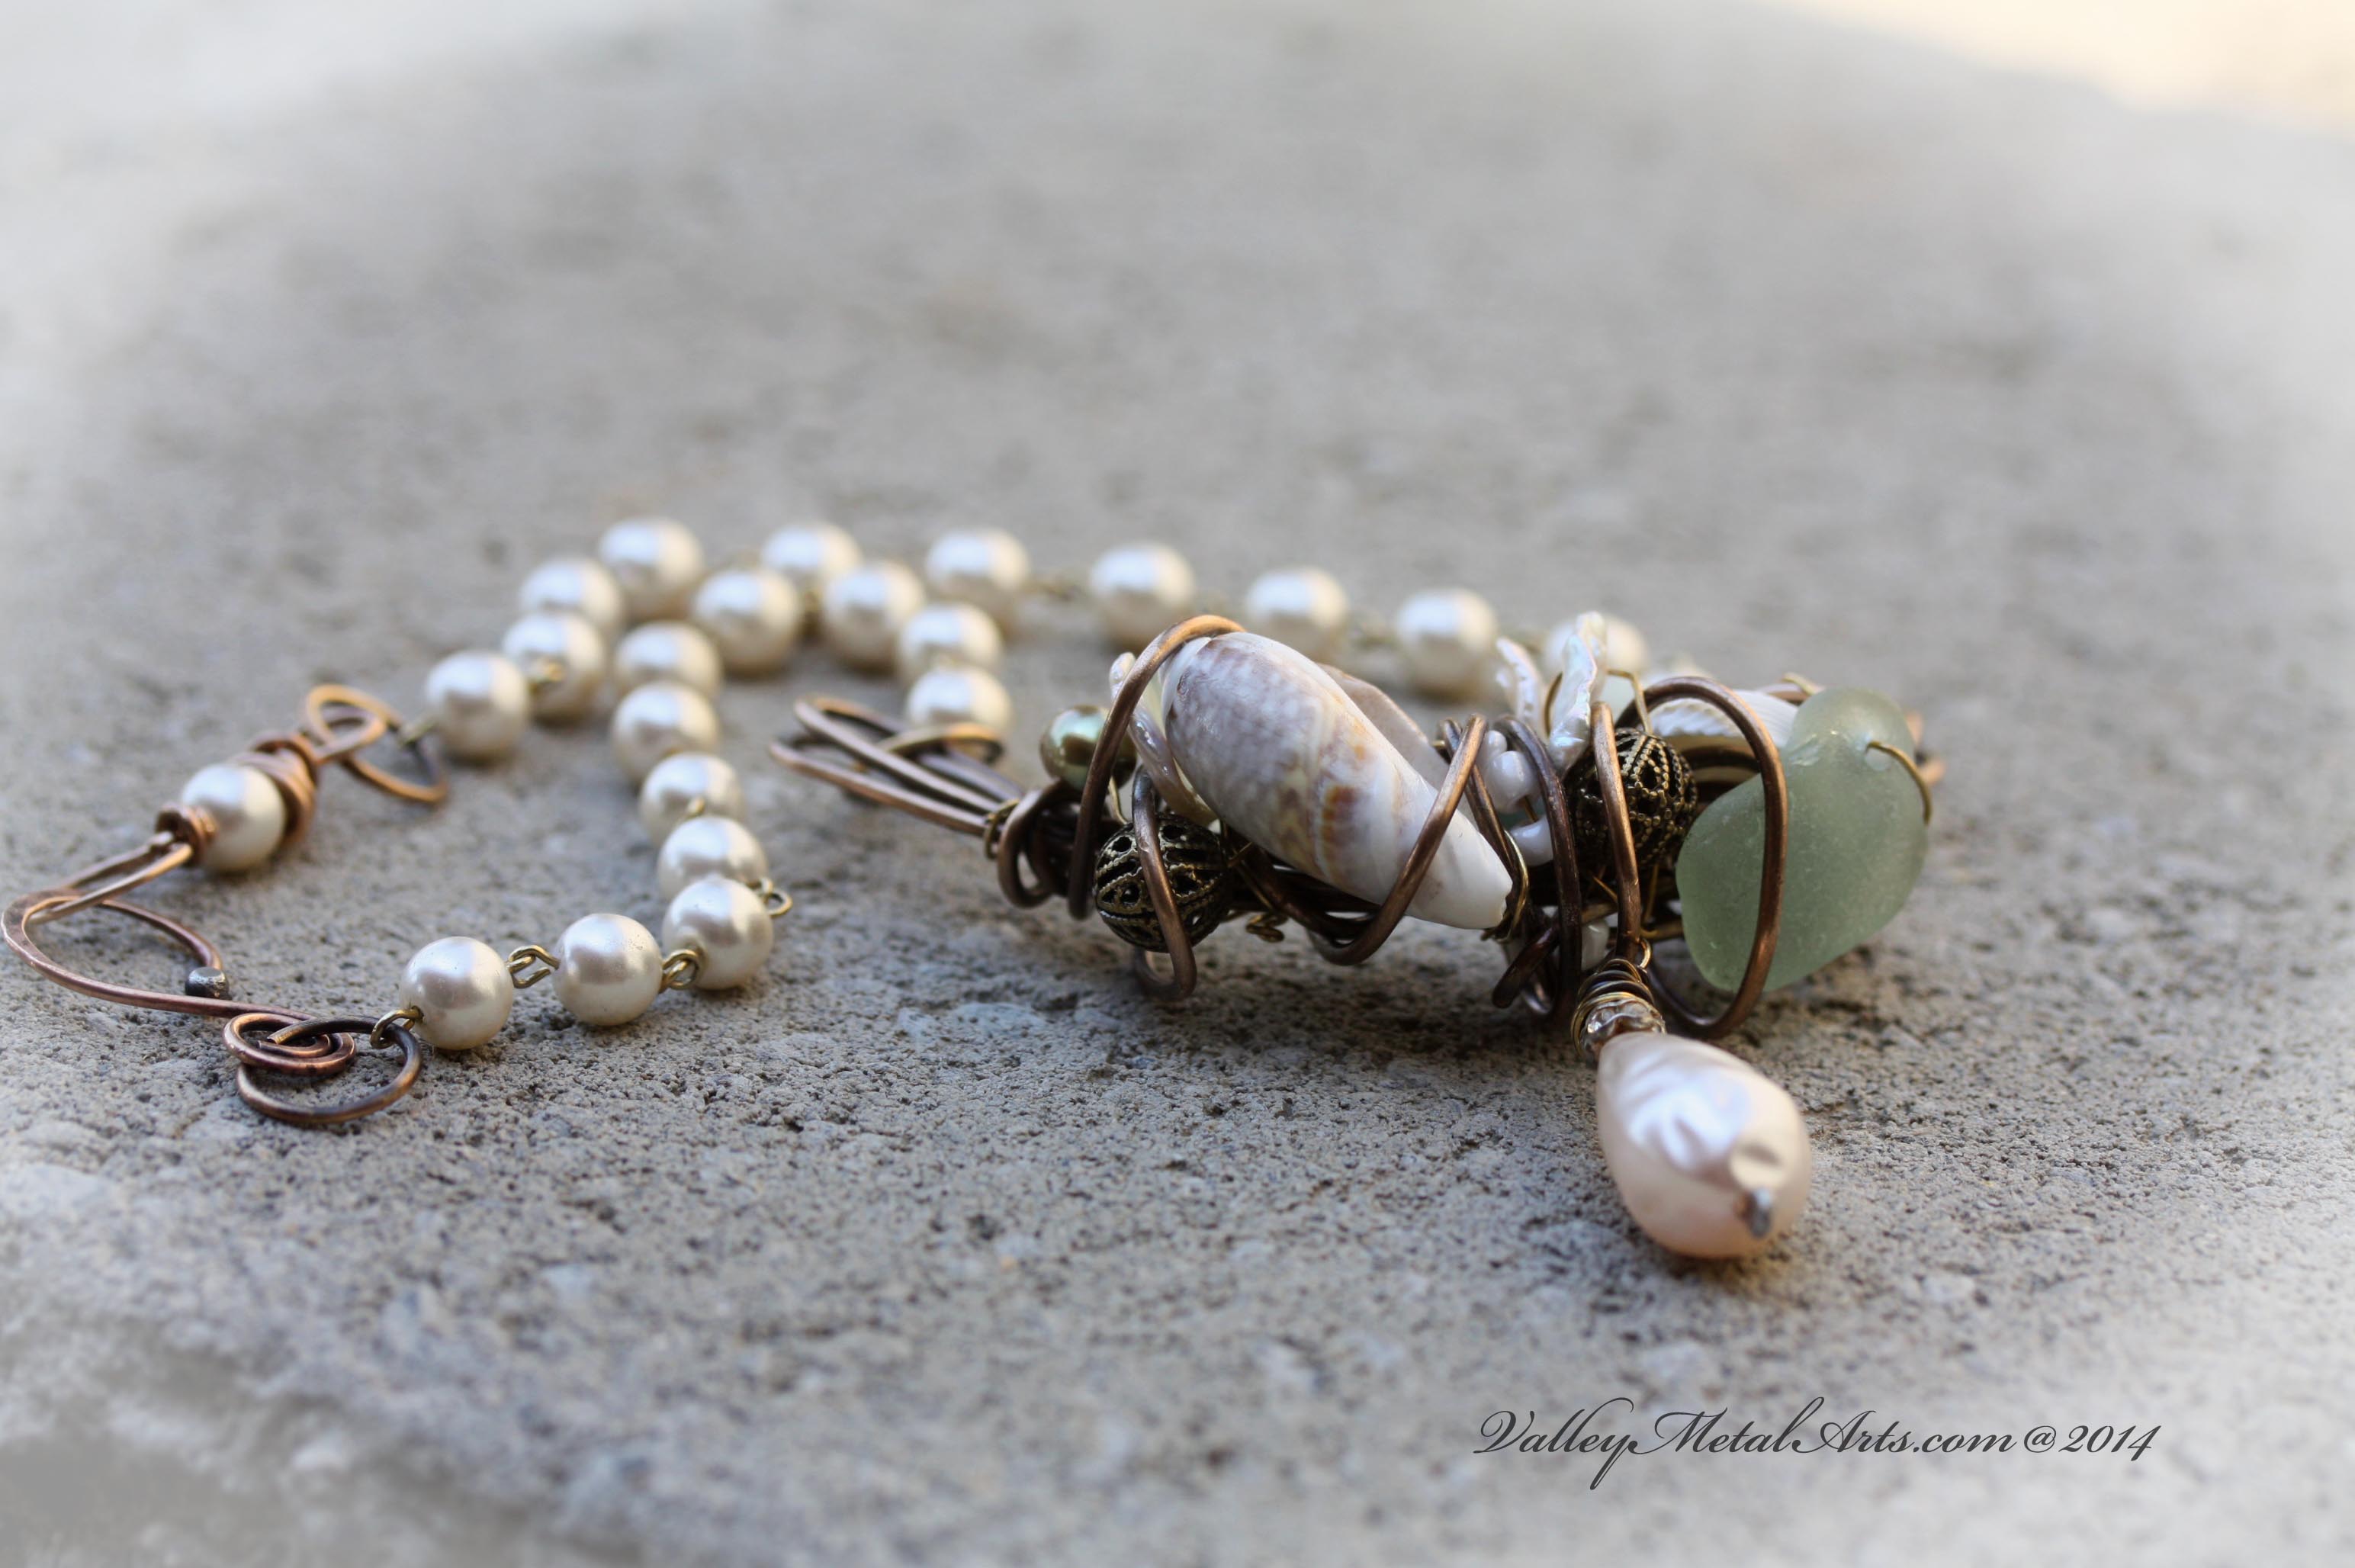
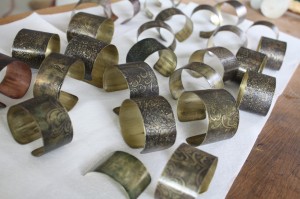
Please feel free to share with anyone wanting this info-and contact me if you have any questions.  In the meantime, I’m back to  my shop, cleaning up the cuffs and trying to decide what next–now comes the magic part ♪♫♪  – The BLING!

IMG_0319


Happy bending!  Not sure how many calories this burns but I’m pretty sure it’s thousands-well, at least 20 …..

Carol

Silver everything!

Silver on SilverTrying a new earring design today-will “test drive”  them tomorrow.  I just adore working with silver, it’s soft, almost buttery, and just is so well behaved!!  The crystal drops are some of the most beautiful beads I’ve ever worked with-the photo doesn’t do them justice.  Will be ordering more of these real quick-

Been playing in the shop with some fabulous heat patina effects on copper-will post more later, but lovin’ how they are shaping up!  Some of our best weather this year..and I’m in the basement —time to move to the outside studio I’m thinkin’.

If you’d like to keep up with me in the shop, just click on the button to the right, enter your email address and you’ll be notified whenever I post new stuff… Thanks all!

Elbow Deep in Demi Cuffs…

This slideshow requires JavaScript.

Finally!!! Something to show for the time spent creating chain links, beading and making attachments–and making use of some of the most exciting etching results I’ve had in years. So pleased with the end results–
I’ve been test-driving one of these bracelets all day, and so far I haven’t ripped it off. (If I don’t like the way anything wears, its back to the drawing board we go–) Love the fit, like the weight and really like the complimentary comments I’ve been getting. Well-the cashier at the grocery store and my husband think they are pretty neat-do those count?
Extra care has gone into these to ensure a good fit and secure links-lots of soldering happening around here. You don’t want to know how many times the first prototype was re-done…
Only 3 are available, if you want one, pop over to my store to order, or PM on FB.

Shades of Summers Past


LBblkbrioscream

We have such incredible sunsets here in Creston, nestled between two mountain ranges, that I wanted to do some pieces to reflect what I am lucky enough to enjoy on a daily basis.  I begin with watercolor paintings, (second photo is my next set in progress)  using the colors of the sky and mountains for each season.  Those pictures were then cut to fit into bezels, filled with resin, with the addition of tiny glass beads-in this case, black ones.  They worked well with the IMG_9066black briolette Swarovski crystal I used at the bottom, attached and wrapped with silver wire.

My ear wires are always silver, work hardened to retain their shape, then dipped in a smelly solution to add an aged patina to them-and that’s it….done.  Hope you like-pop over to my store if interested in these ones, and please leave me a comment and come back often!

Topsy Turvy N’ Tangled

CWtanThese earrings were so much fun to make-Gave me a great excuse to use a few  brass beads I’d been holding onto, and to take out some aggression on some bronze wire…it got twisted, bent, pounded and soldered until it gave in and did what I wanted-

The focal of these pieces are the glass beads, created by local artist Judy Gadicke.  On top of those I placed some little bronze caps that I cut and etched-they purposely sit askew, or cattywompus …so am calling these several sets just that….See them over on my Etsy site and a few others that are similar and just as tipsy and turvy:).